C4Max-V8
How to flash a C4MAX-V8 device
This procedure explains how to update (flash) the firmware of a Munic C4MAX-V8 device with a USB pen drive. It is the C4MAX version of the Munic "How to flash a V8+ device" procedure. The main differences with the V8+ are: the device is powered through its 20-pin cable harness instead of an OBD plug, the pen drive is connected to the Micro USB port on the device side, and the internal battery must be physically disconnected before flashing.
1. Requirements before starting
The following tools and files are required to update/flash a Munic C4MAX:
A USB pen drive or a SD card with an adapter formated in FAT32, more than 512 MB and 16 GB maximum


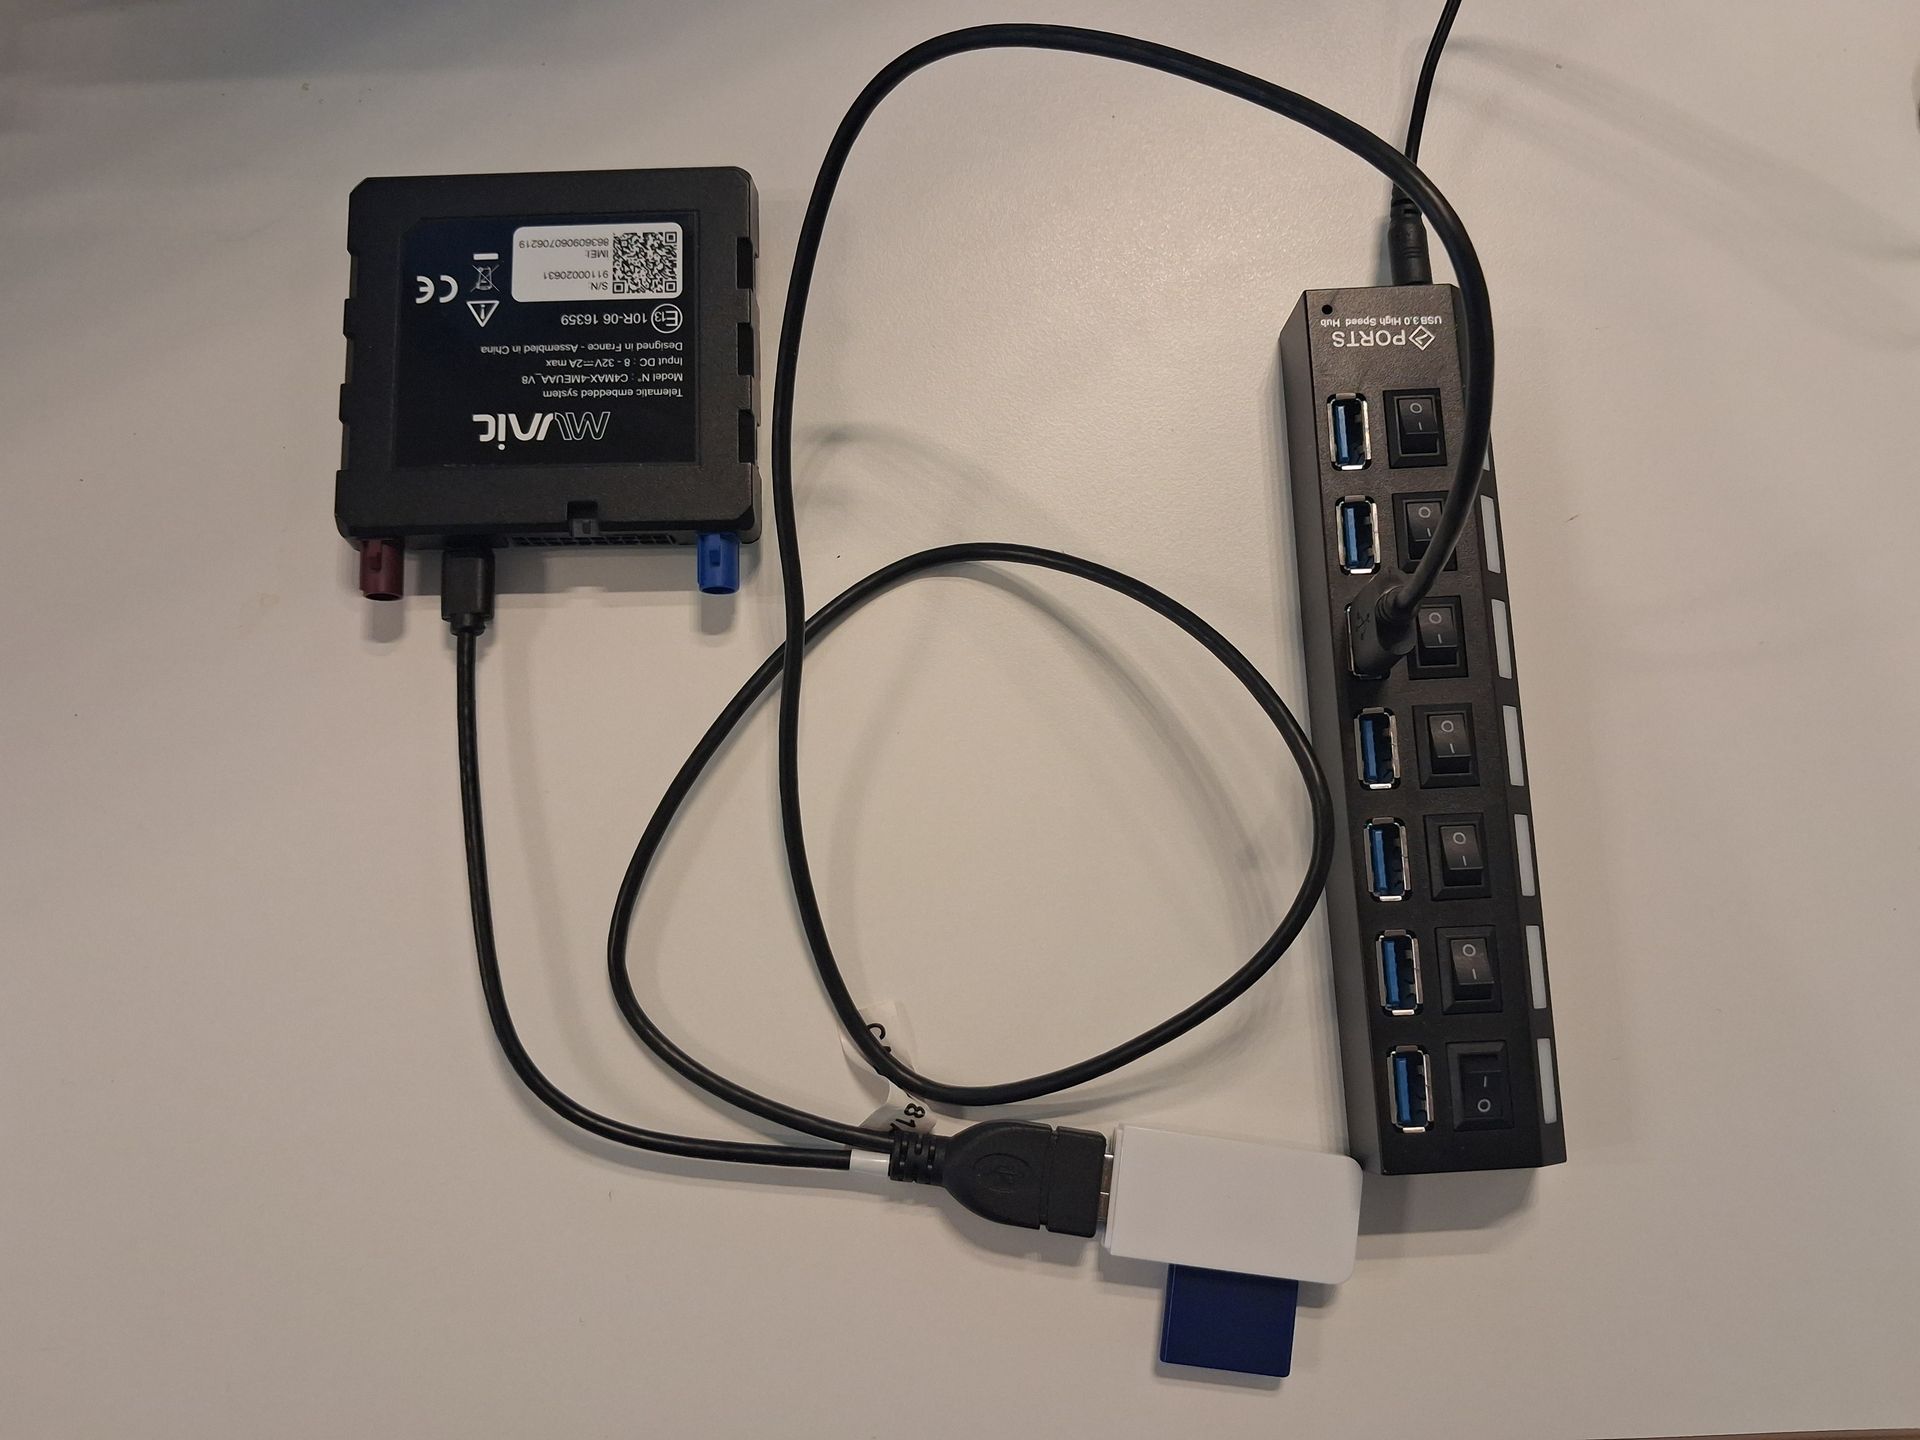
A USB Y cable as in the picture

A flat tool to open the housing

The C4MAX cable harness (Micro-Fit 3.0, 20 pins)
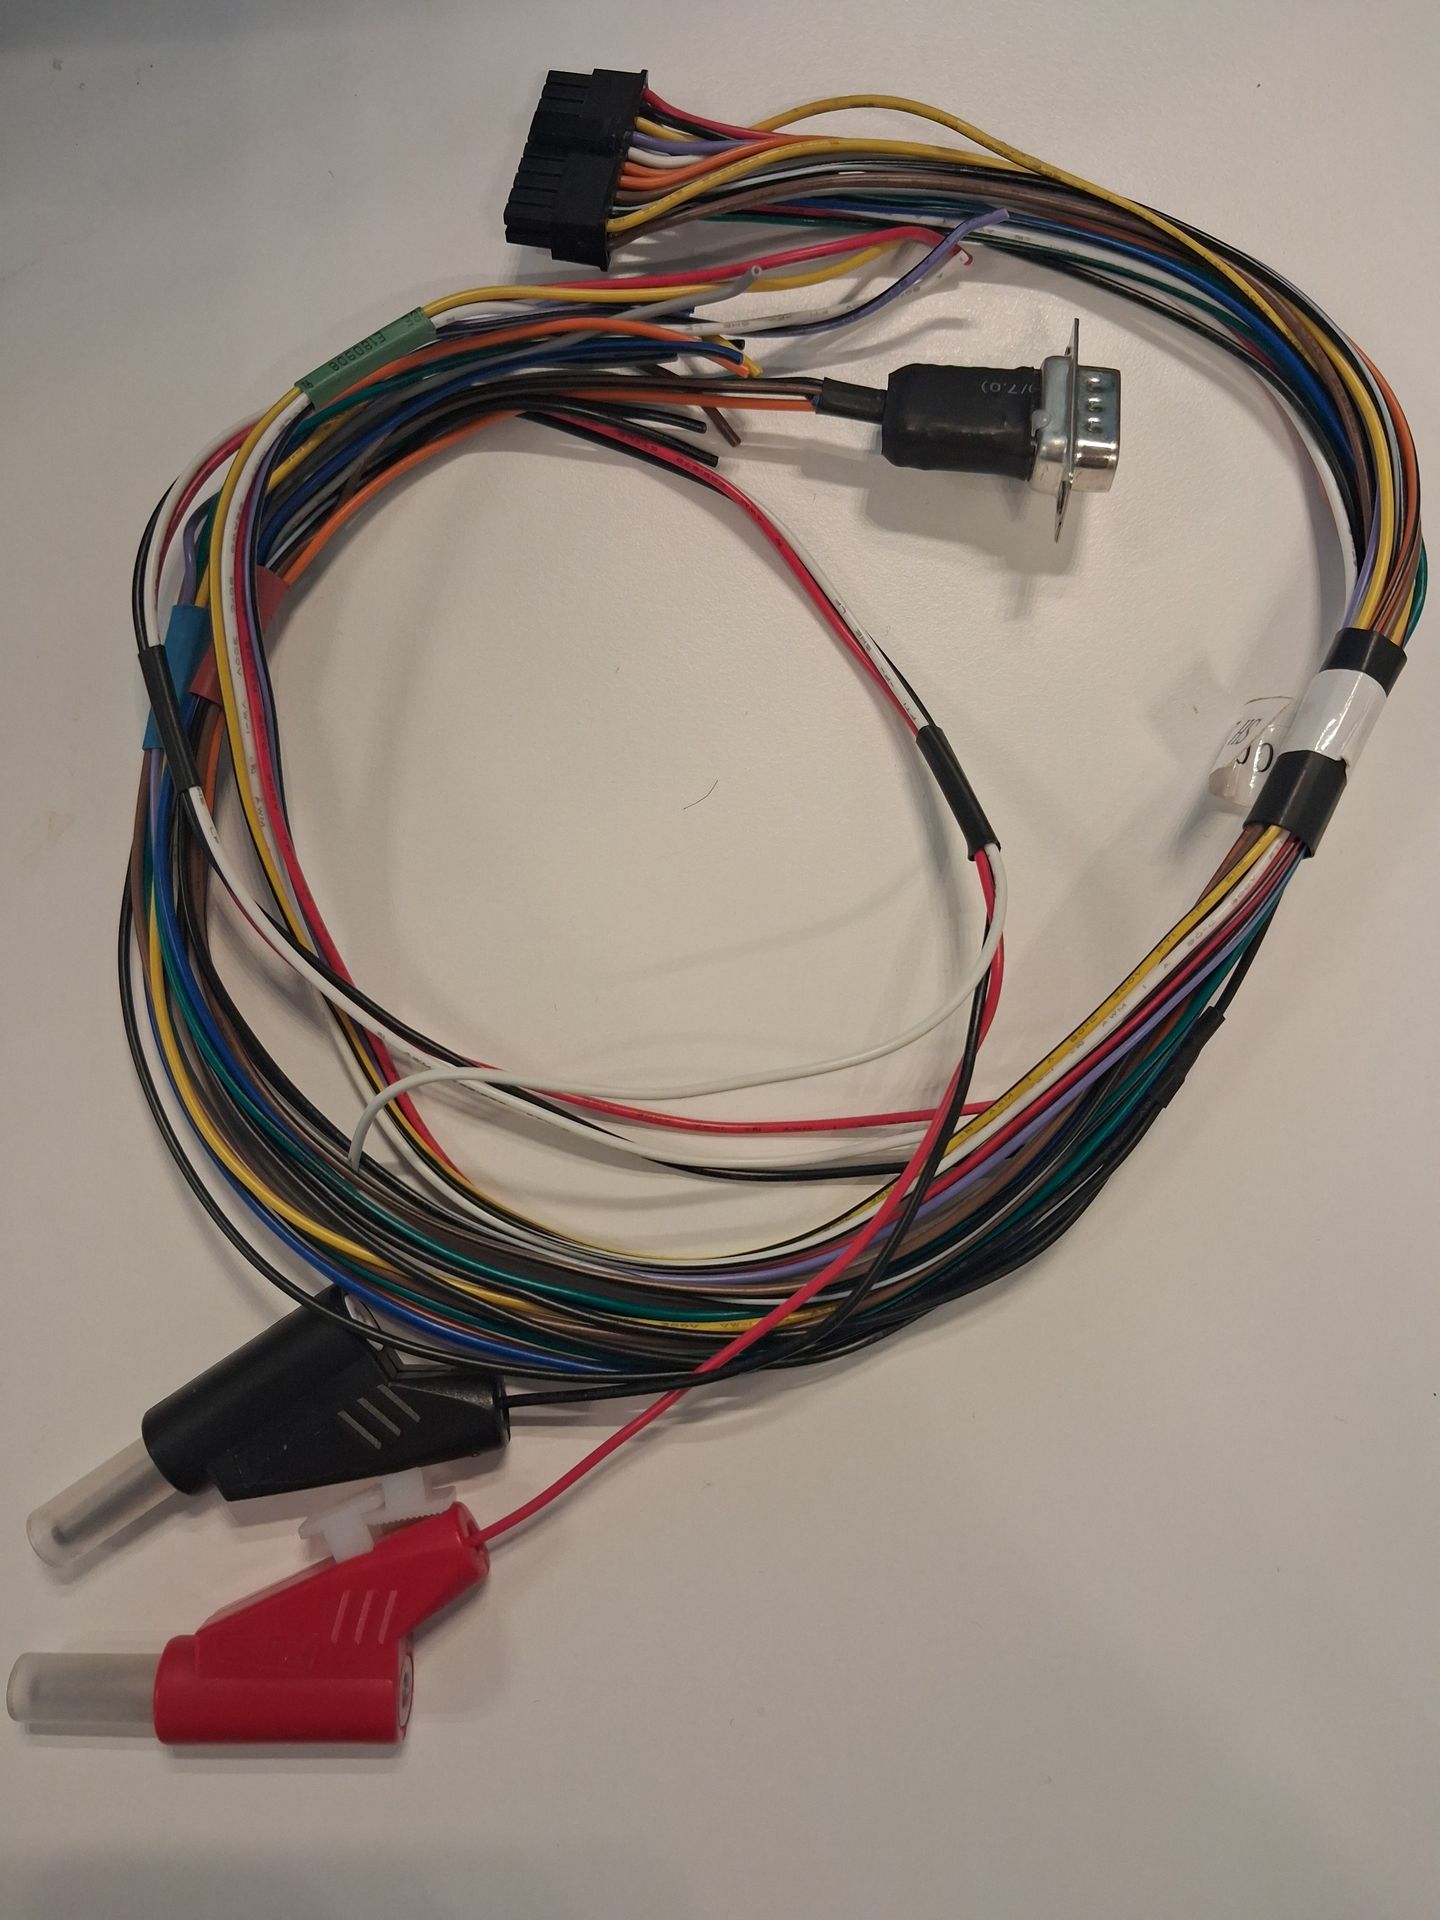
A 12 V to 13.8 V DC laboratory power supply able to deliver 2 A, with a 2 A fuse on the positive wire (optional if the device is already wired in a vehicle)

The MDI_PCK* package, obtained only from your Munic contact

2. Prepare the pen drive (or SD card)
1. Format the pen drive using FAT32.
2. Extract the content of the MDI_PCK* archive on your computer.
3. Copy the content of the "sd" folder (not the folder itself) to the root of the pen drive.

3. Open the device and disconnect the internal battery
The device must be completely OFF before flashing, which means no external power and no internal battery. On the C4MAX, the only way to switch the internal battery off is to unplug its connector.
1. Disconnect the device from any power source (vehicle or power supply).
2. Insert the flat tool into the hole on top of each lug on the side of the housing and pry gently to release it. Repeat on the second lug, then on the two lugs of the other side.
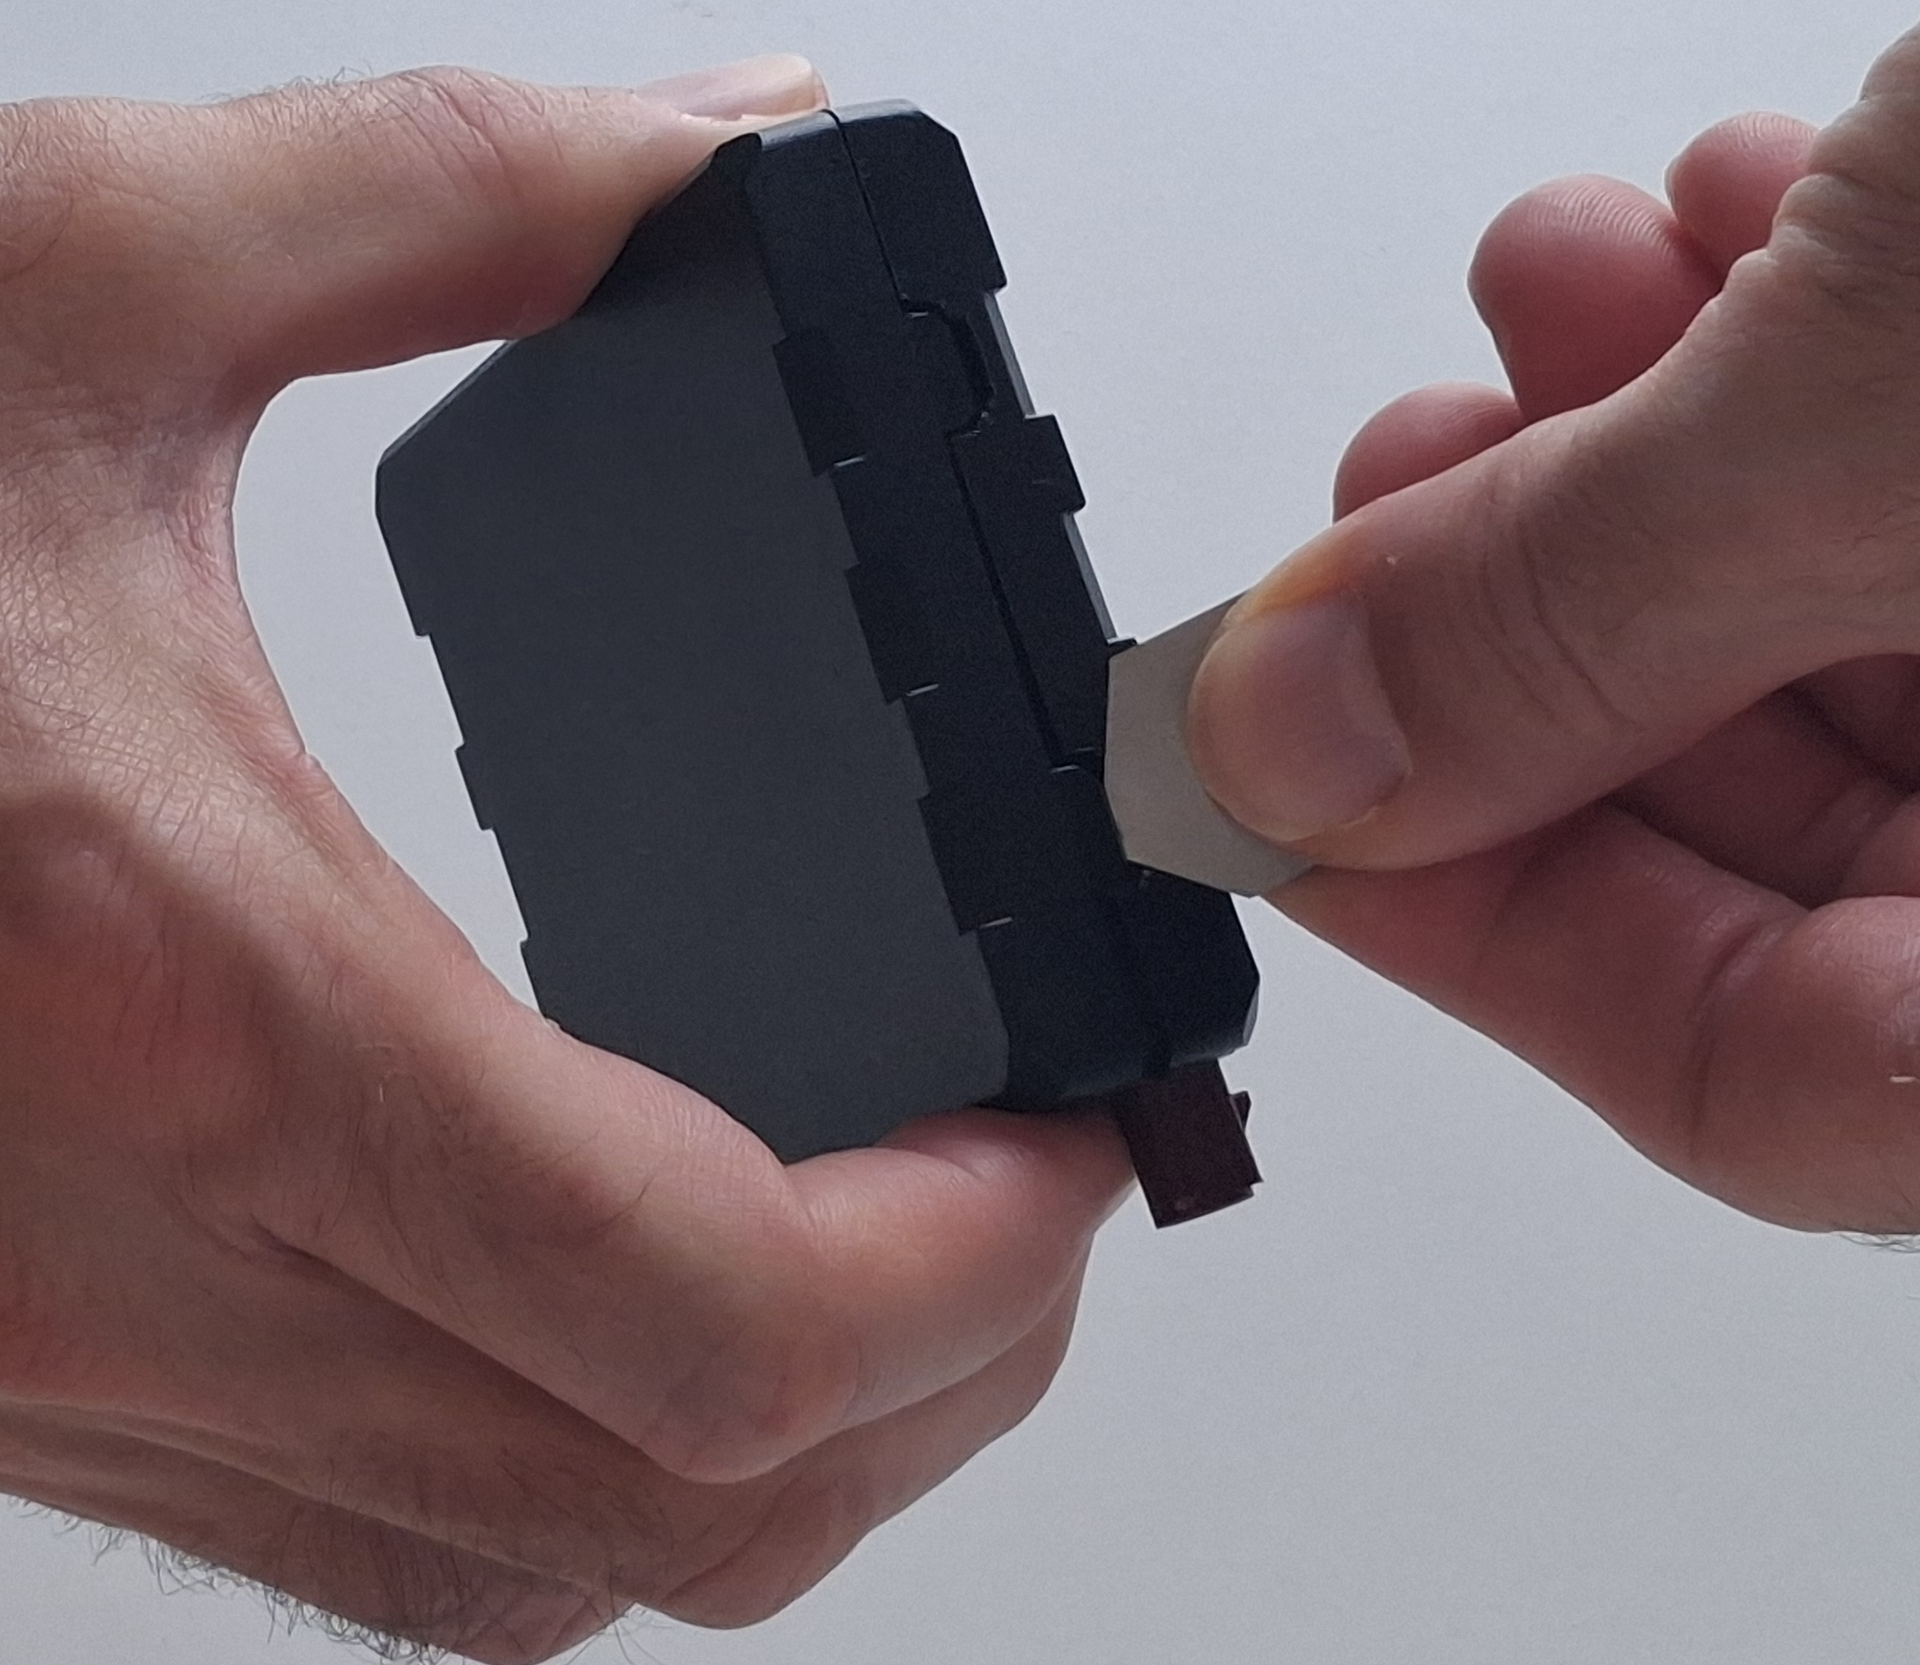
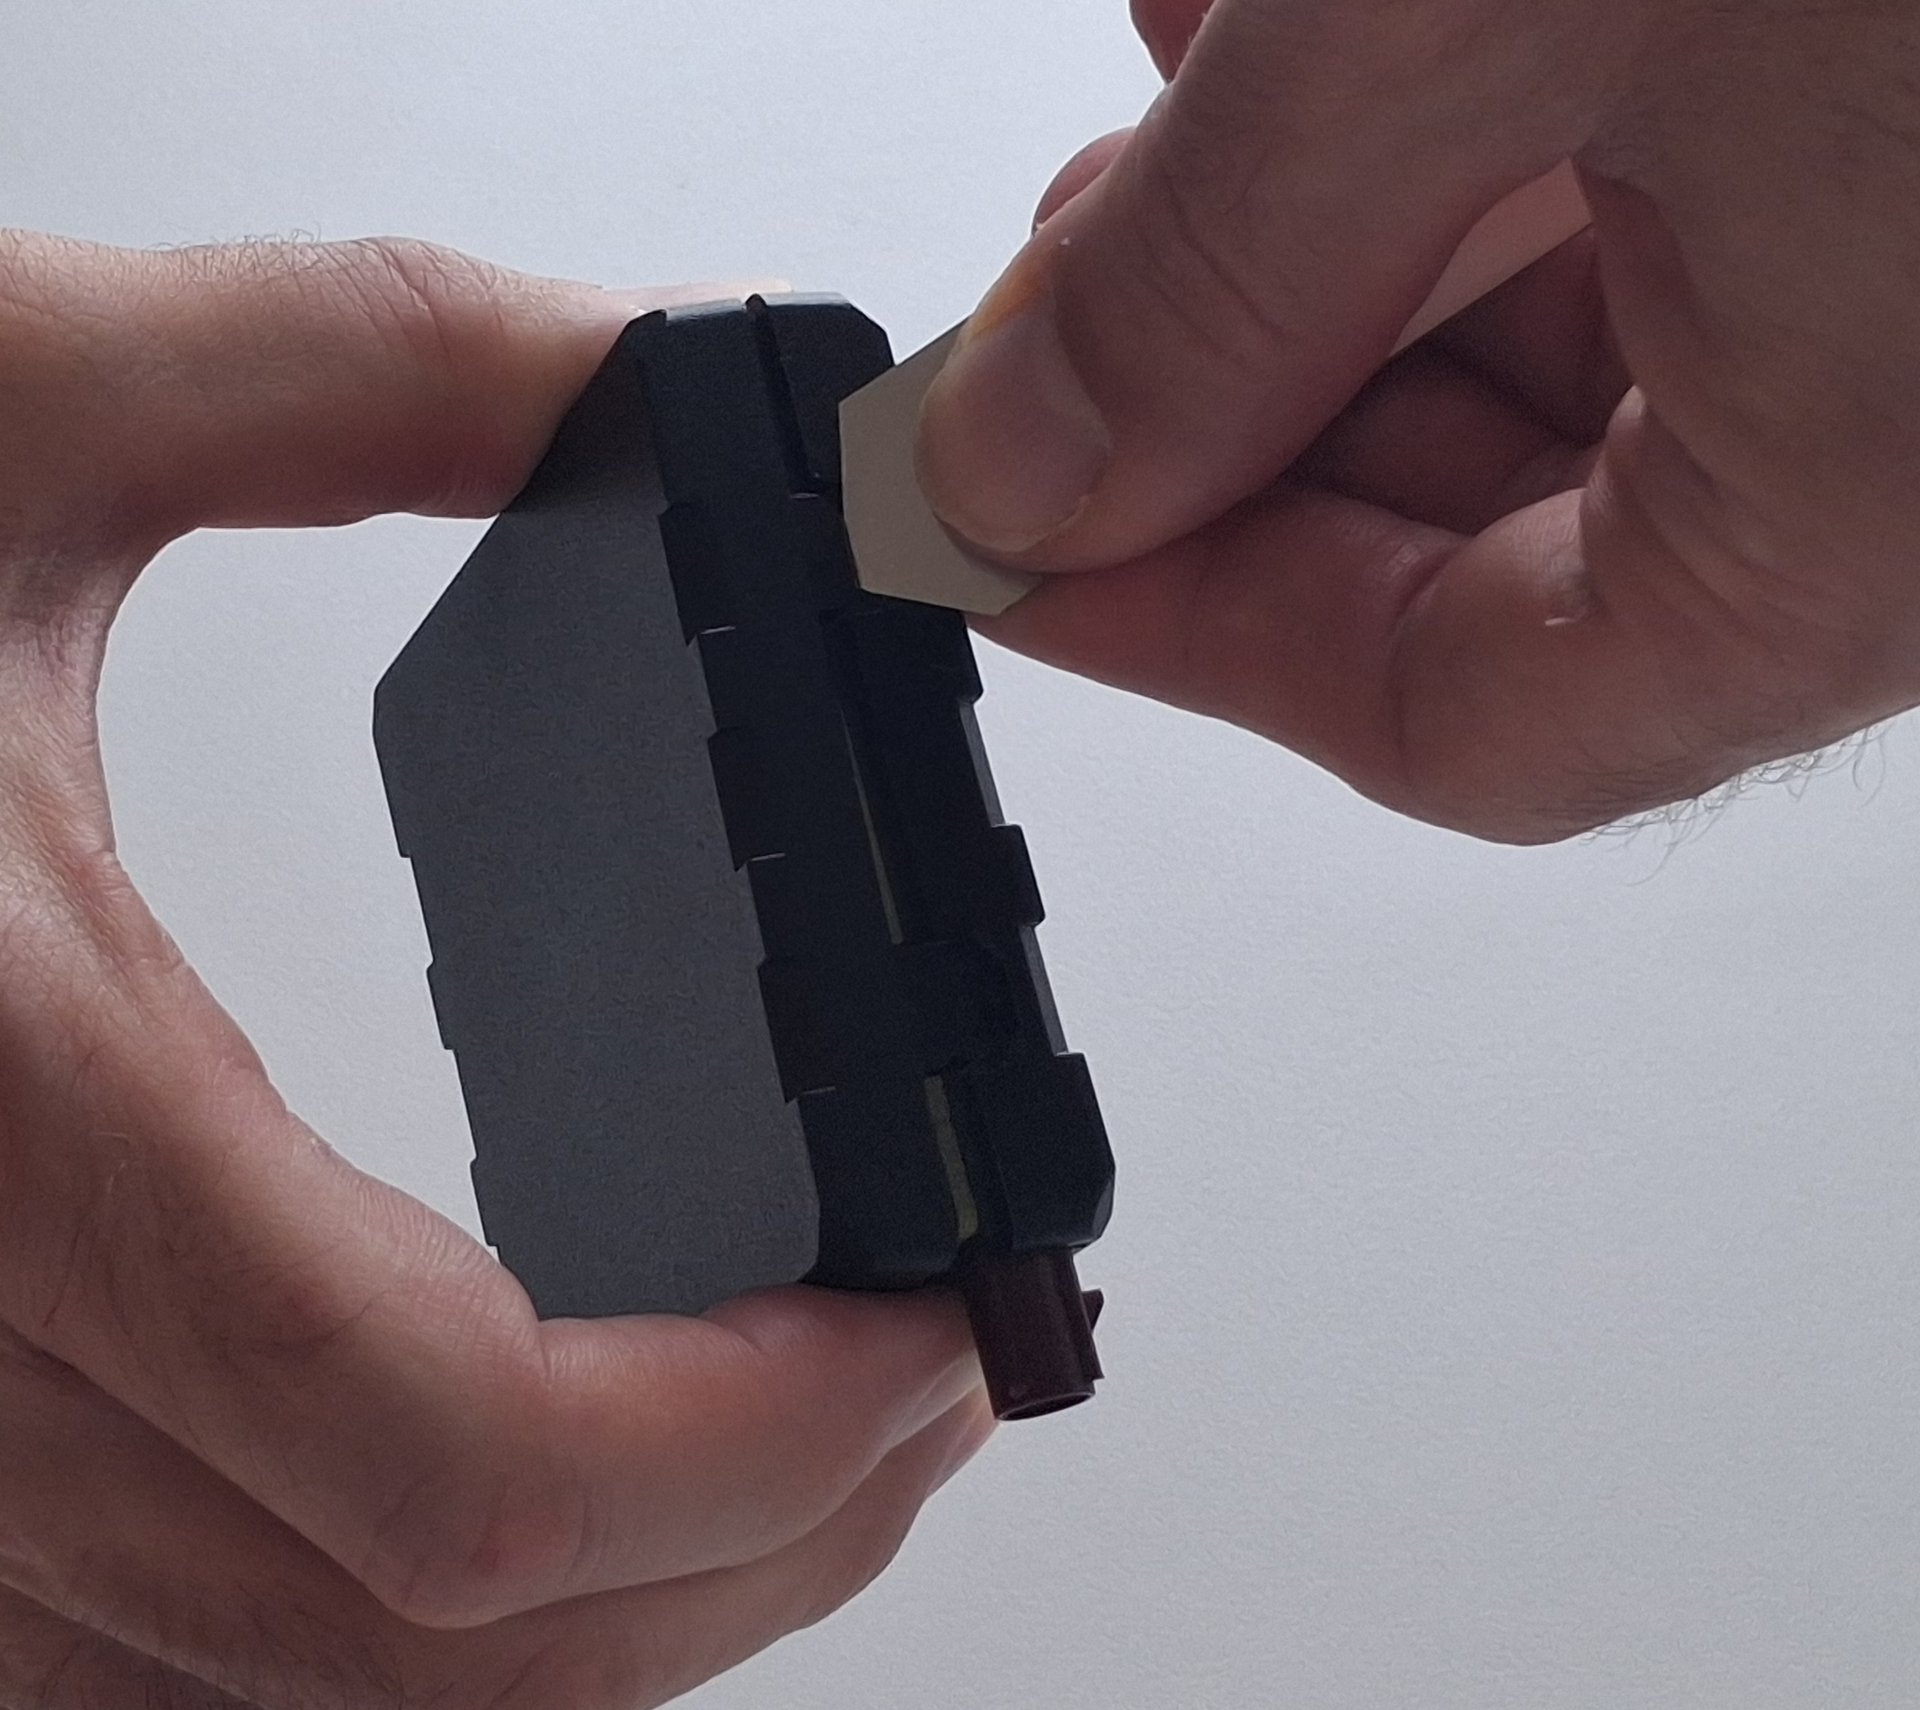
3. Lift and remove the top cover.

4. Unplug the battery connector from the circuit board with the pliers. Pull the connector itself, never the wires, so as not to damage the connector.
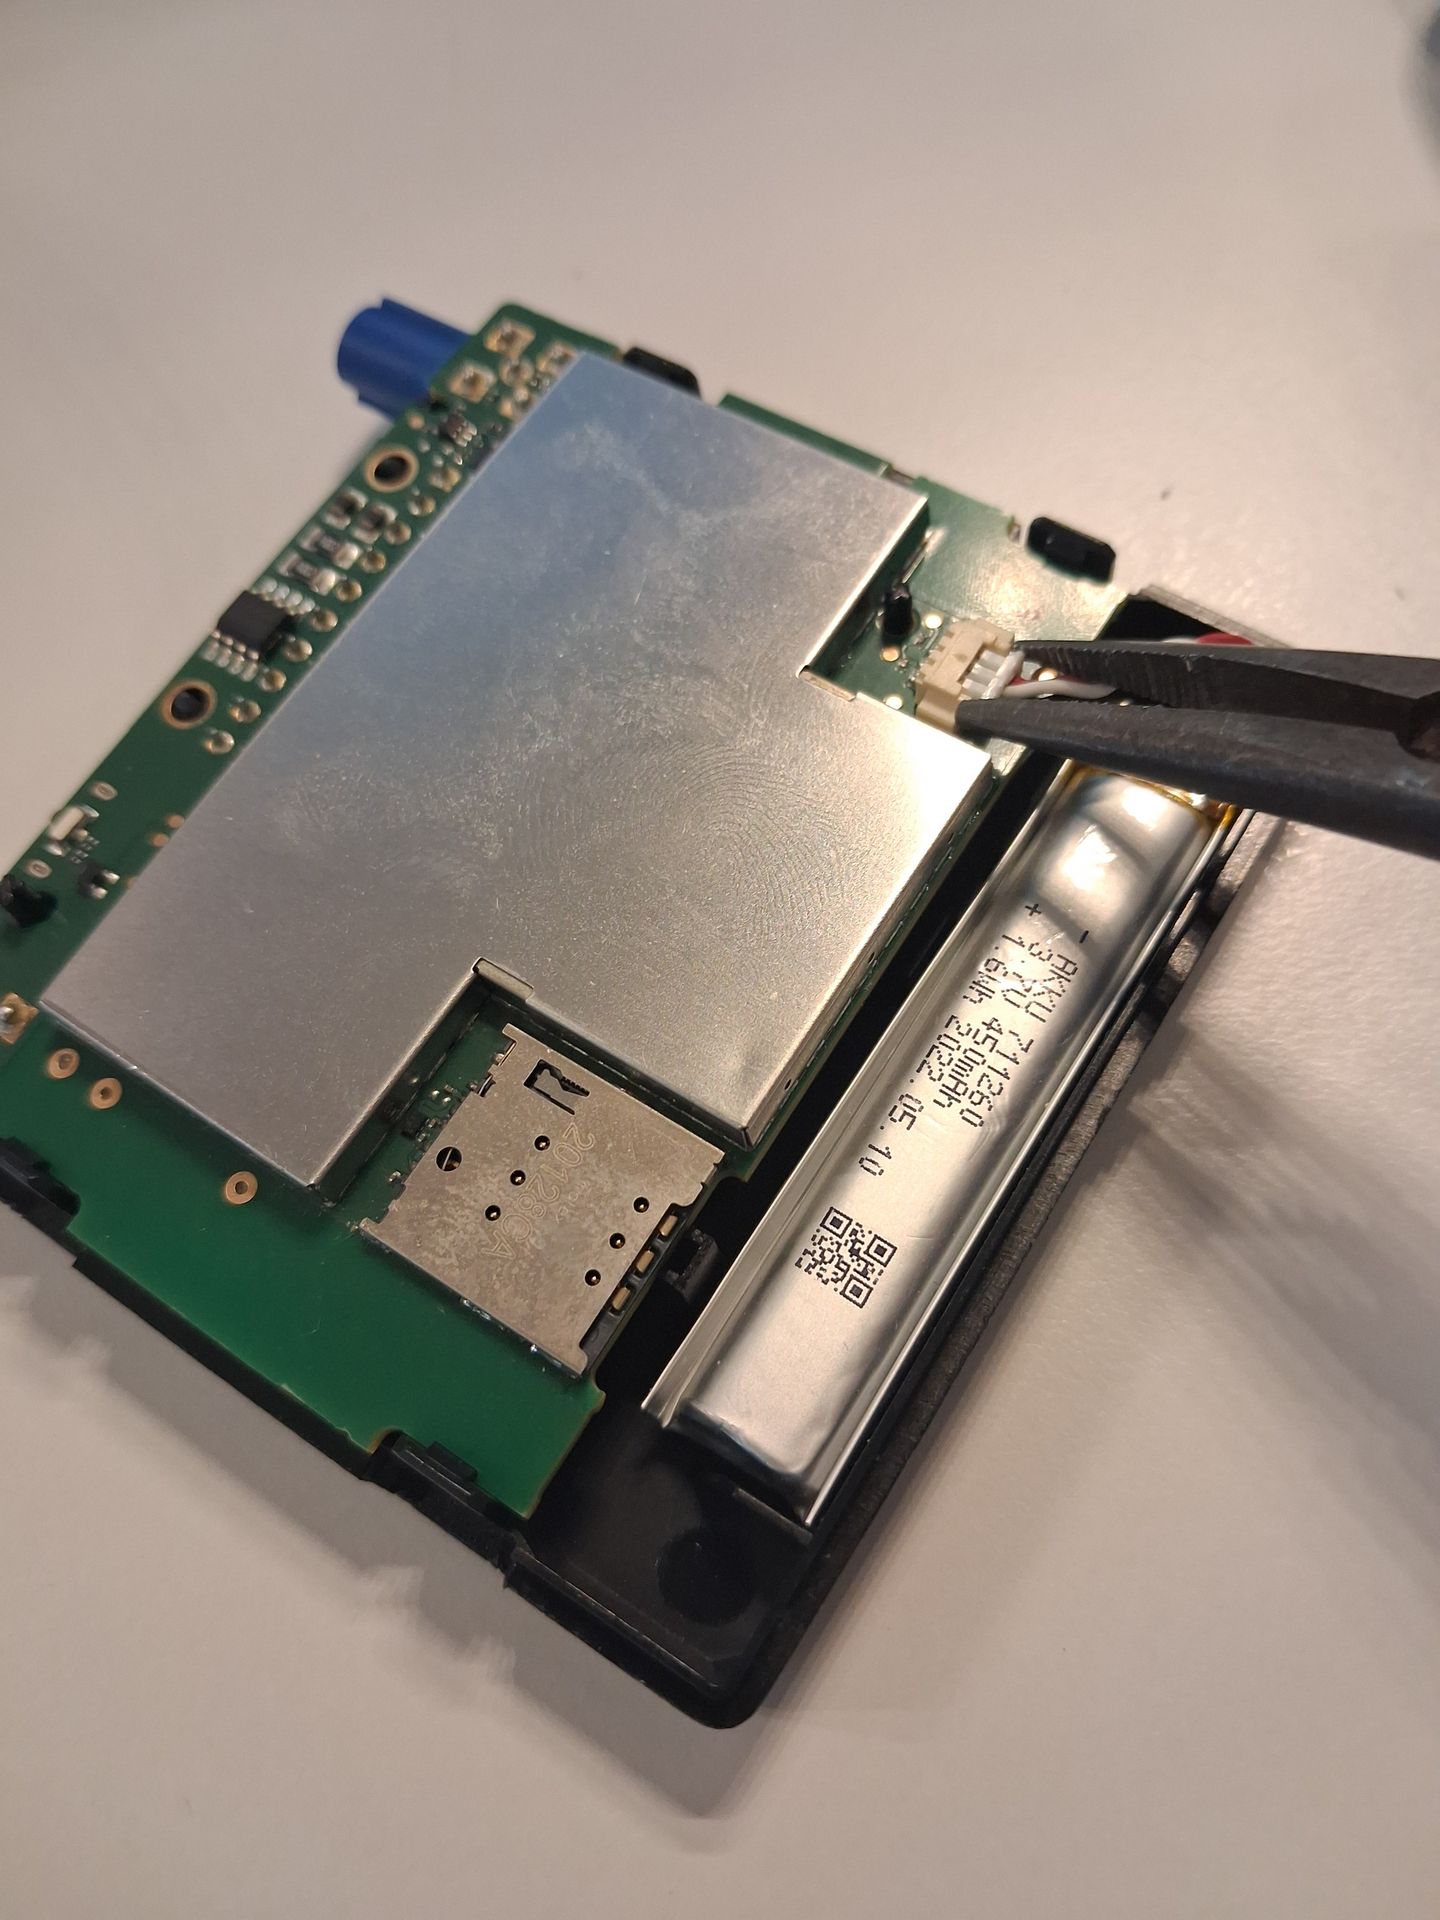
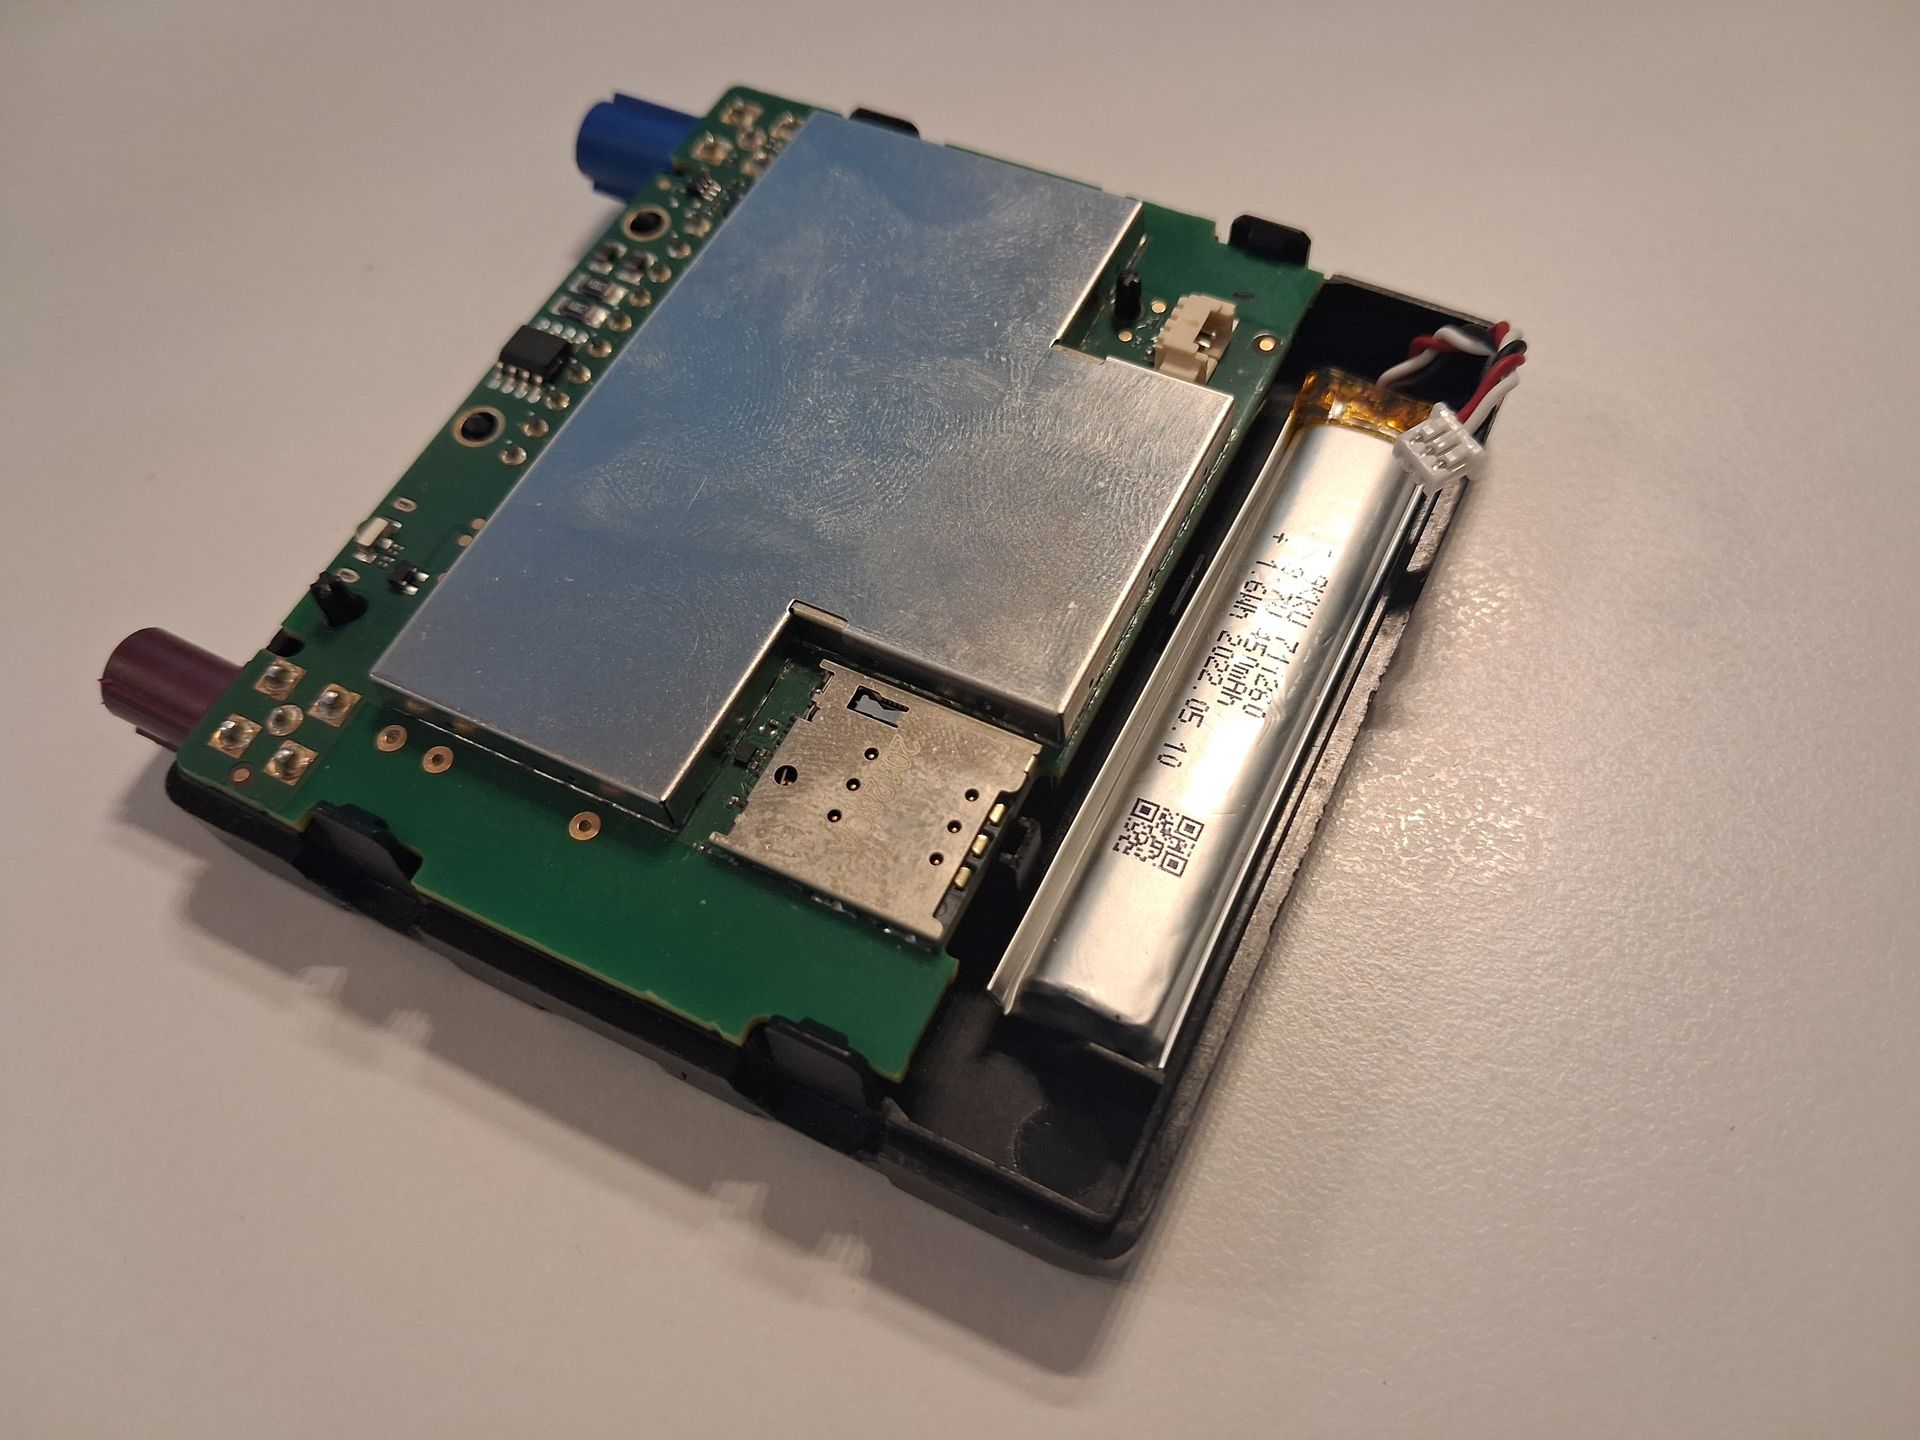
Check the LED on the front of the device: it must be completely off, not blinking at all. A short red blink every second (30 ms ON, 1 s OFF) means the device is only sleeping or hibernating on its battery, so the battery is still connected.
4. Wire the power supply
If the device is installed in a vehicle, keep the vehicle harness disconnected for now. On a test bench, prepare the cable harness as follows, with the power supply switched off:
Signal | Pin | Wire colour | Connect to |
GND | 12 | Black | Power supply negative (always connect first) |
VBATT | 24 | Red | Power supply positive, through a 2 A fuse |
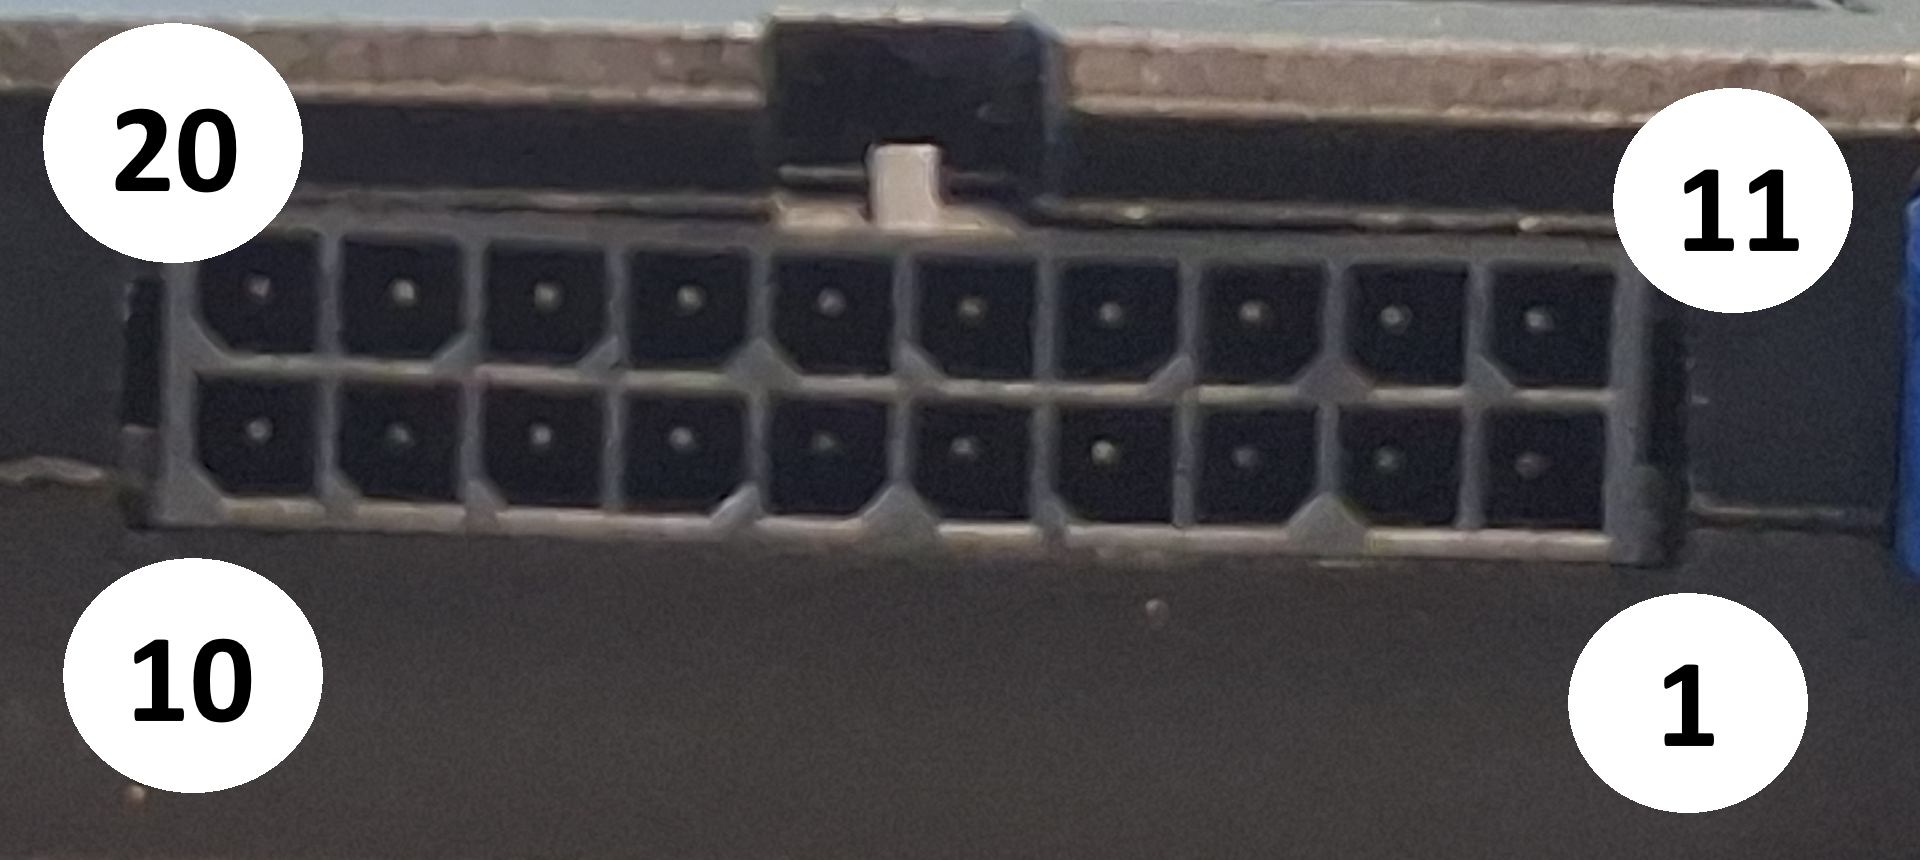
Micro-Fit 20-pin connector, pin numbering seen from the device side.
5. Flash the device
1. Make sure the device is OFF: battery unplugged, no external power, LED fully dead.
2. Connect the pen drive (or SD card with adapter) to the USB Y cable
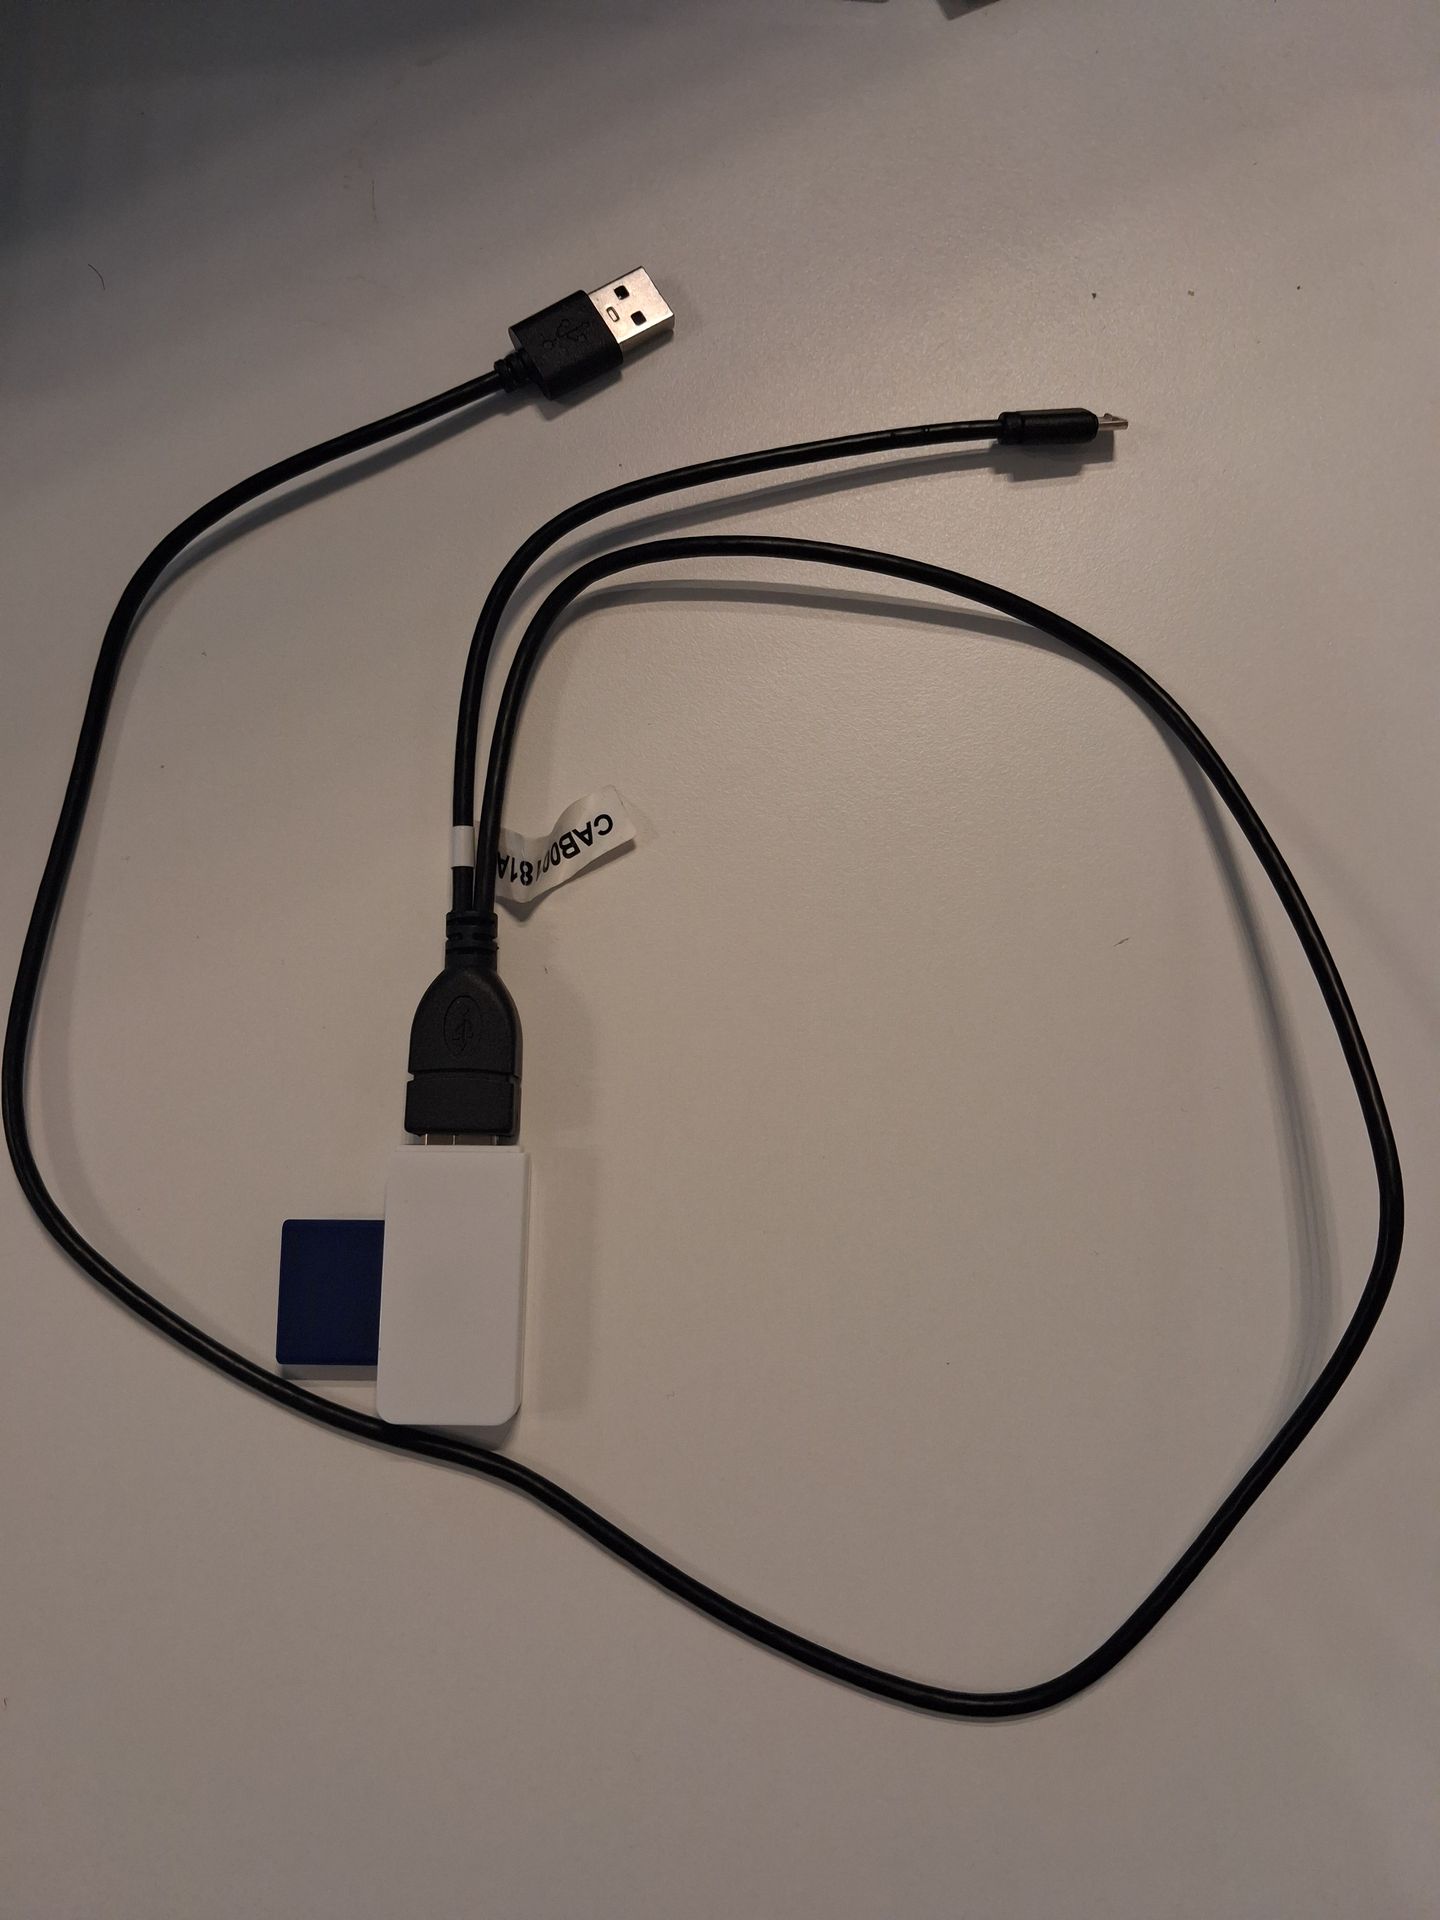
3. Connect the Micro USB connector to the Micro USB port of the device
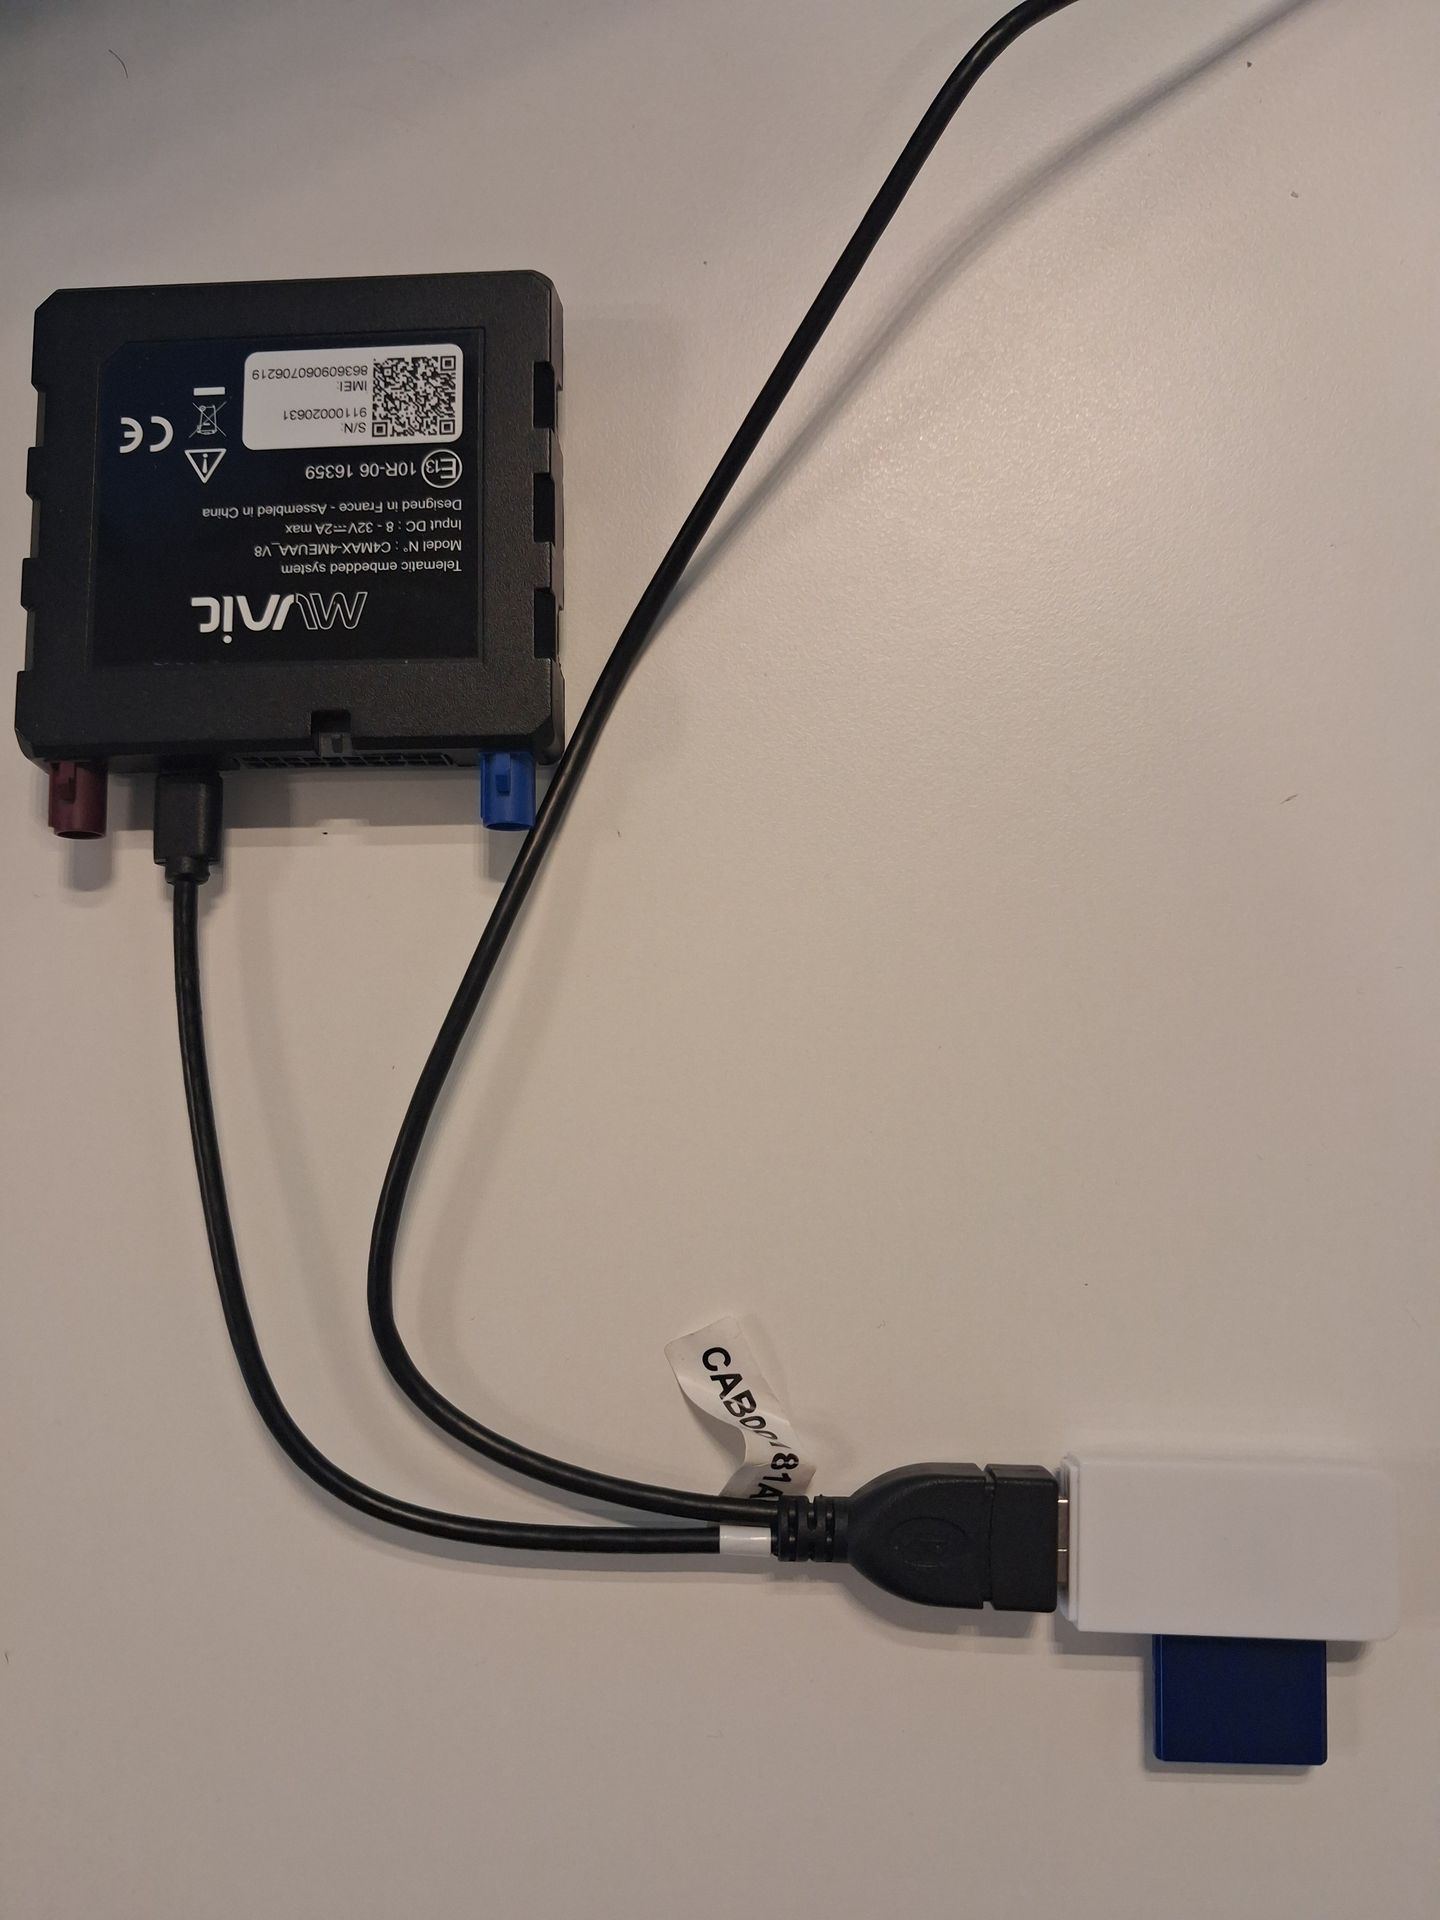
4. Connect the USB connector to a USB hub or a computer (to power on the pen drive)
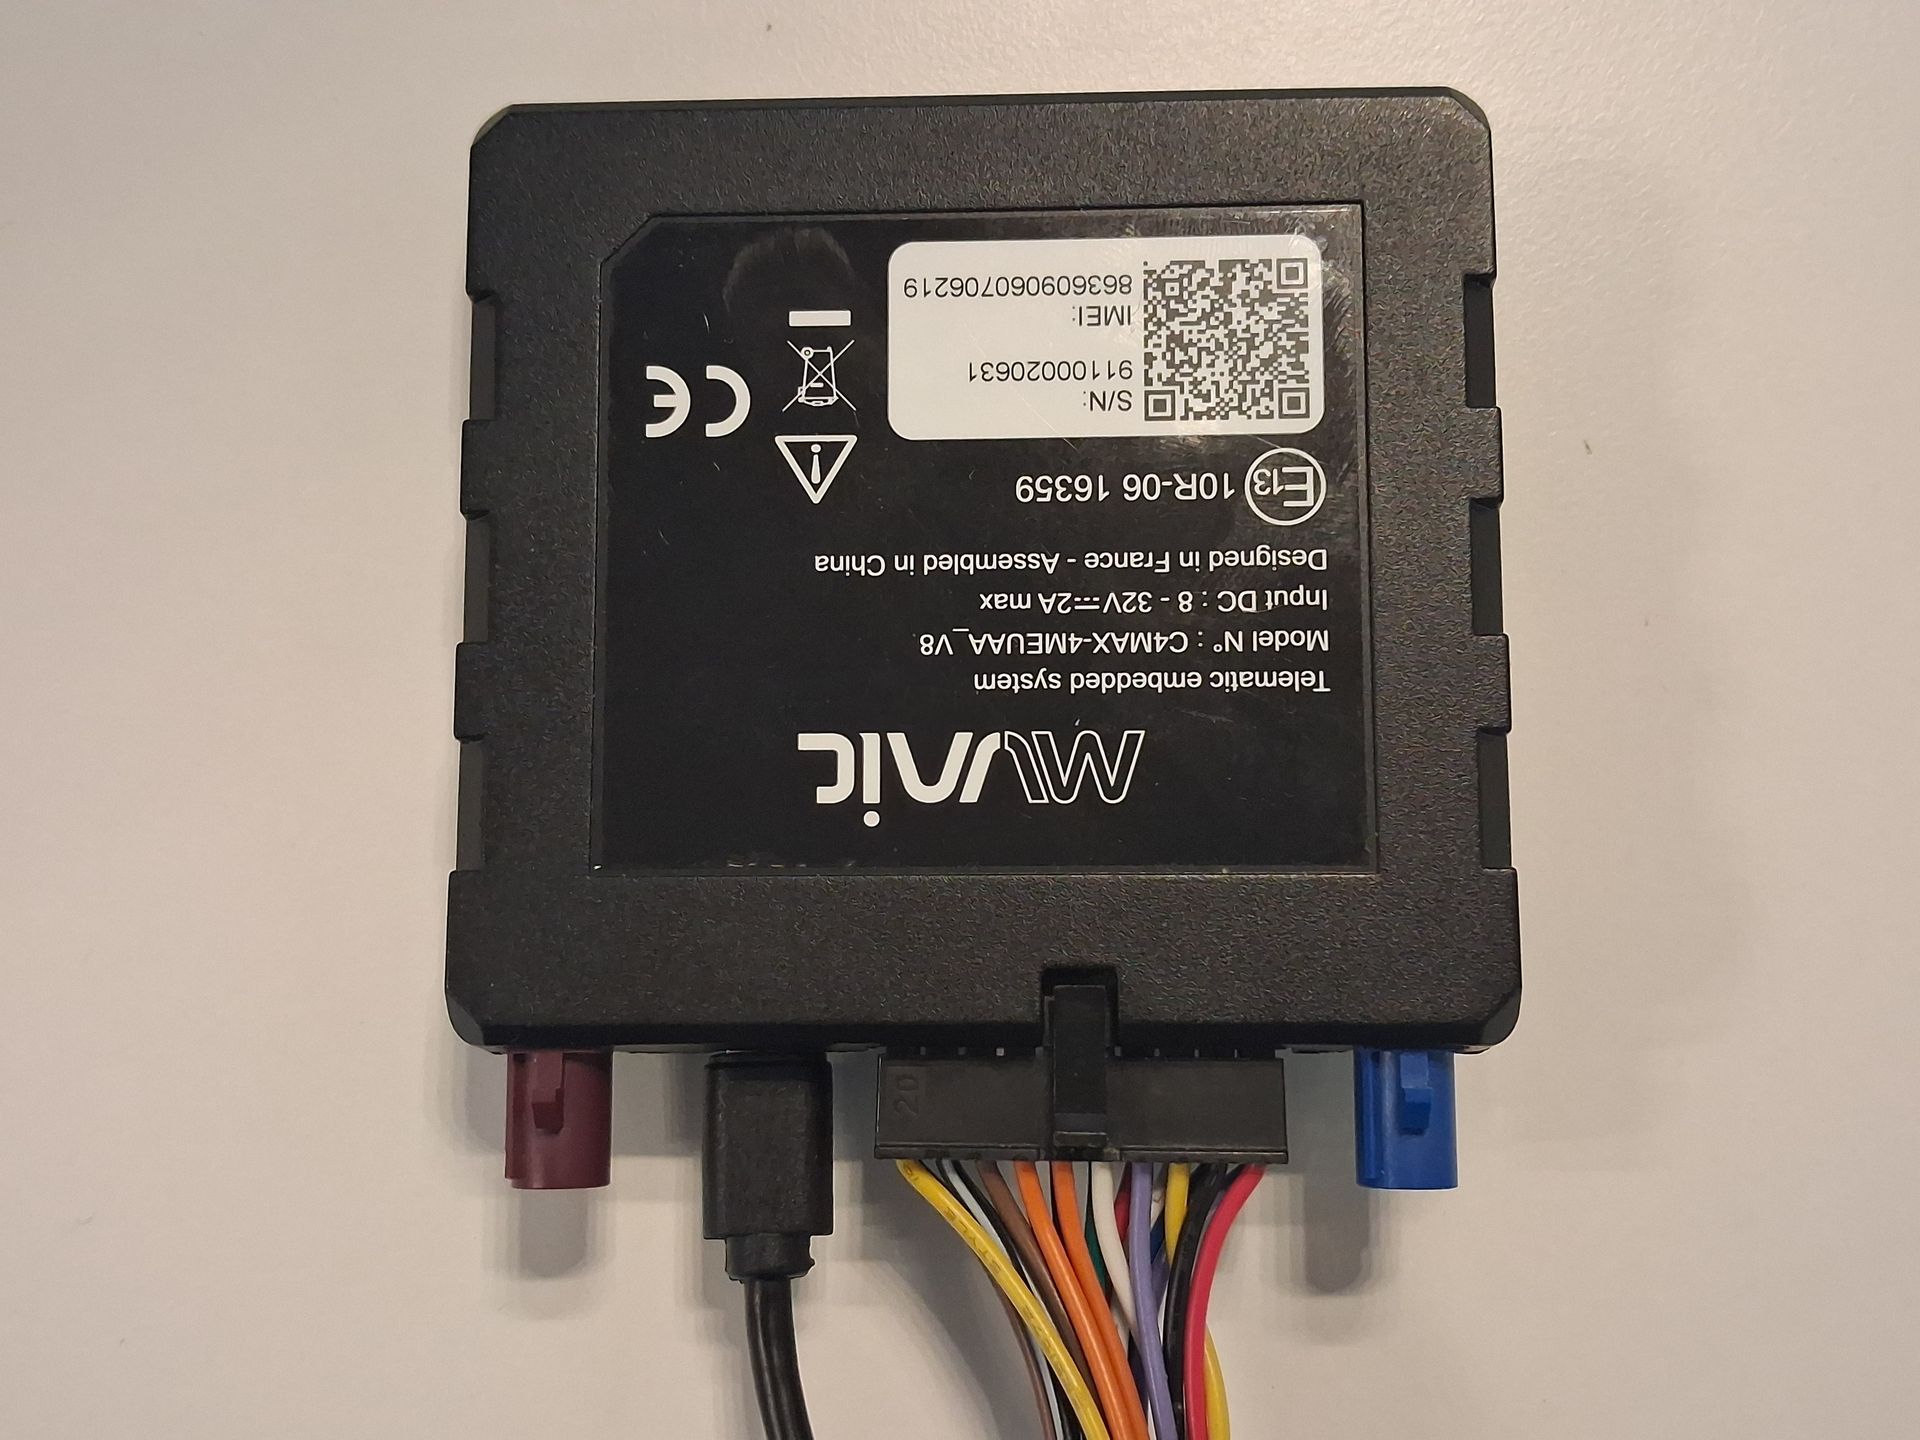
5. Connect the harness to the device (Micro-Fit 20-pin connector on the front).
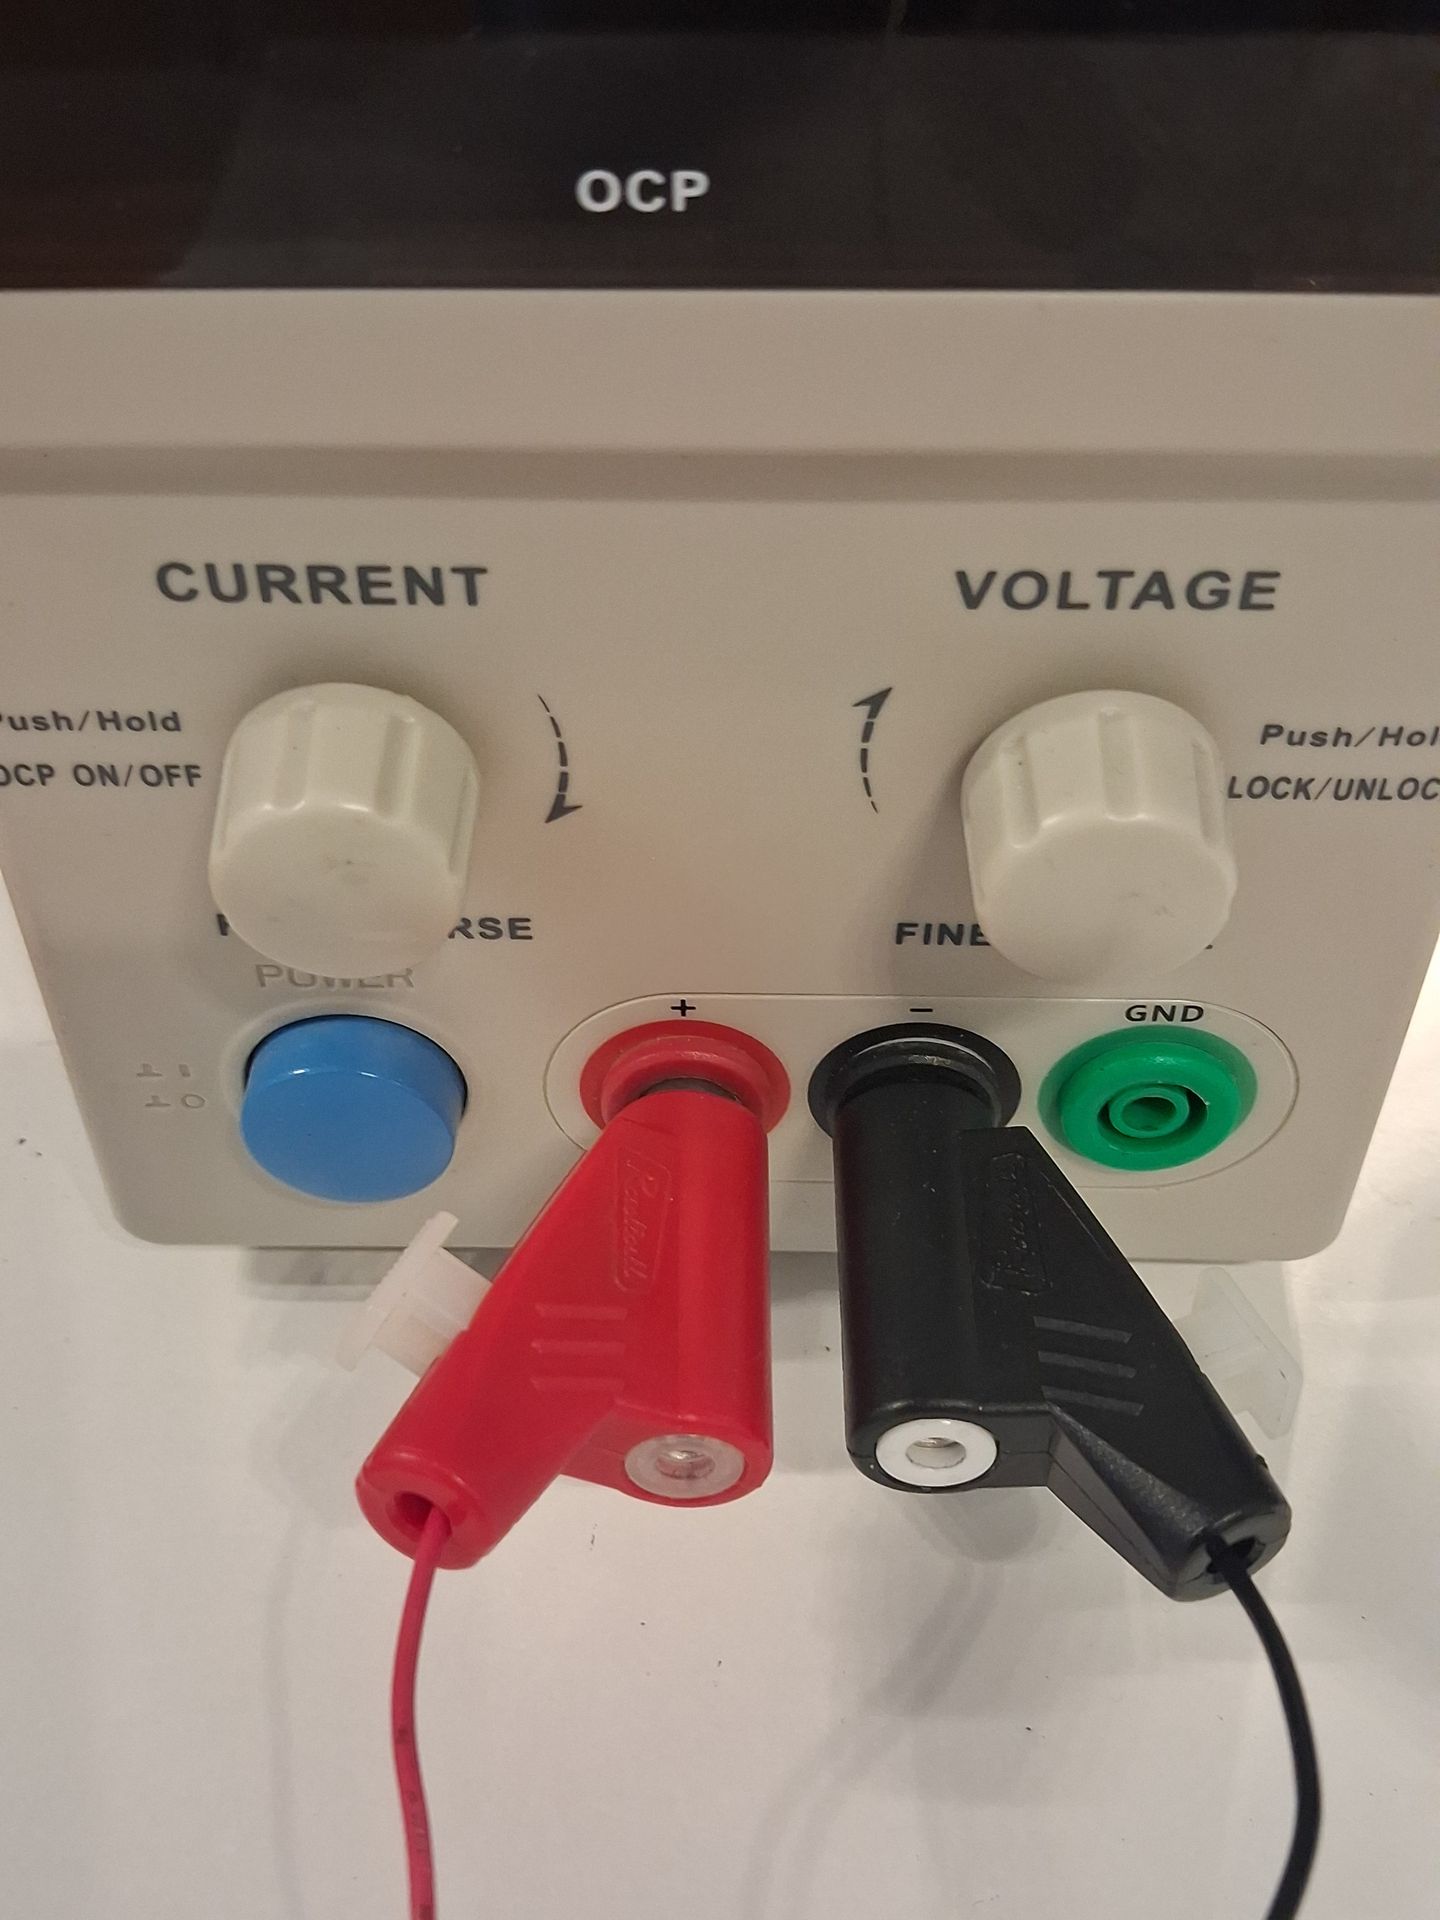
6. Connect the harness to the power supply (red wire to "+" of power supply and black to "-" of power supply)
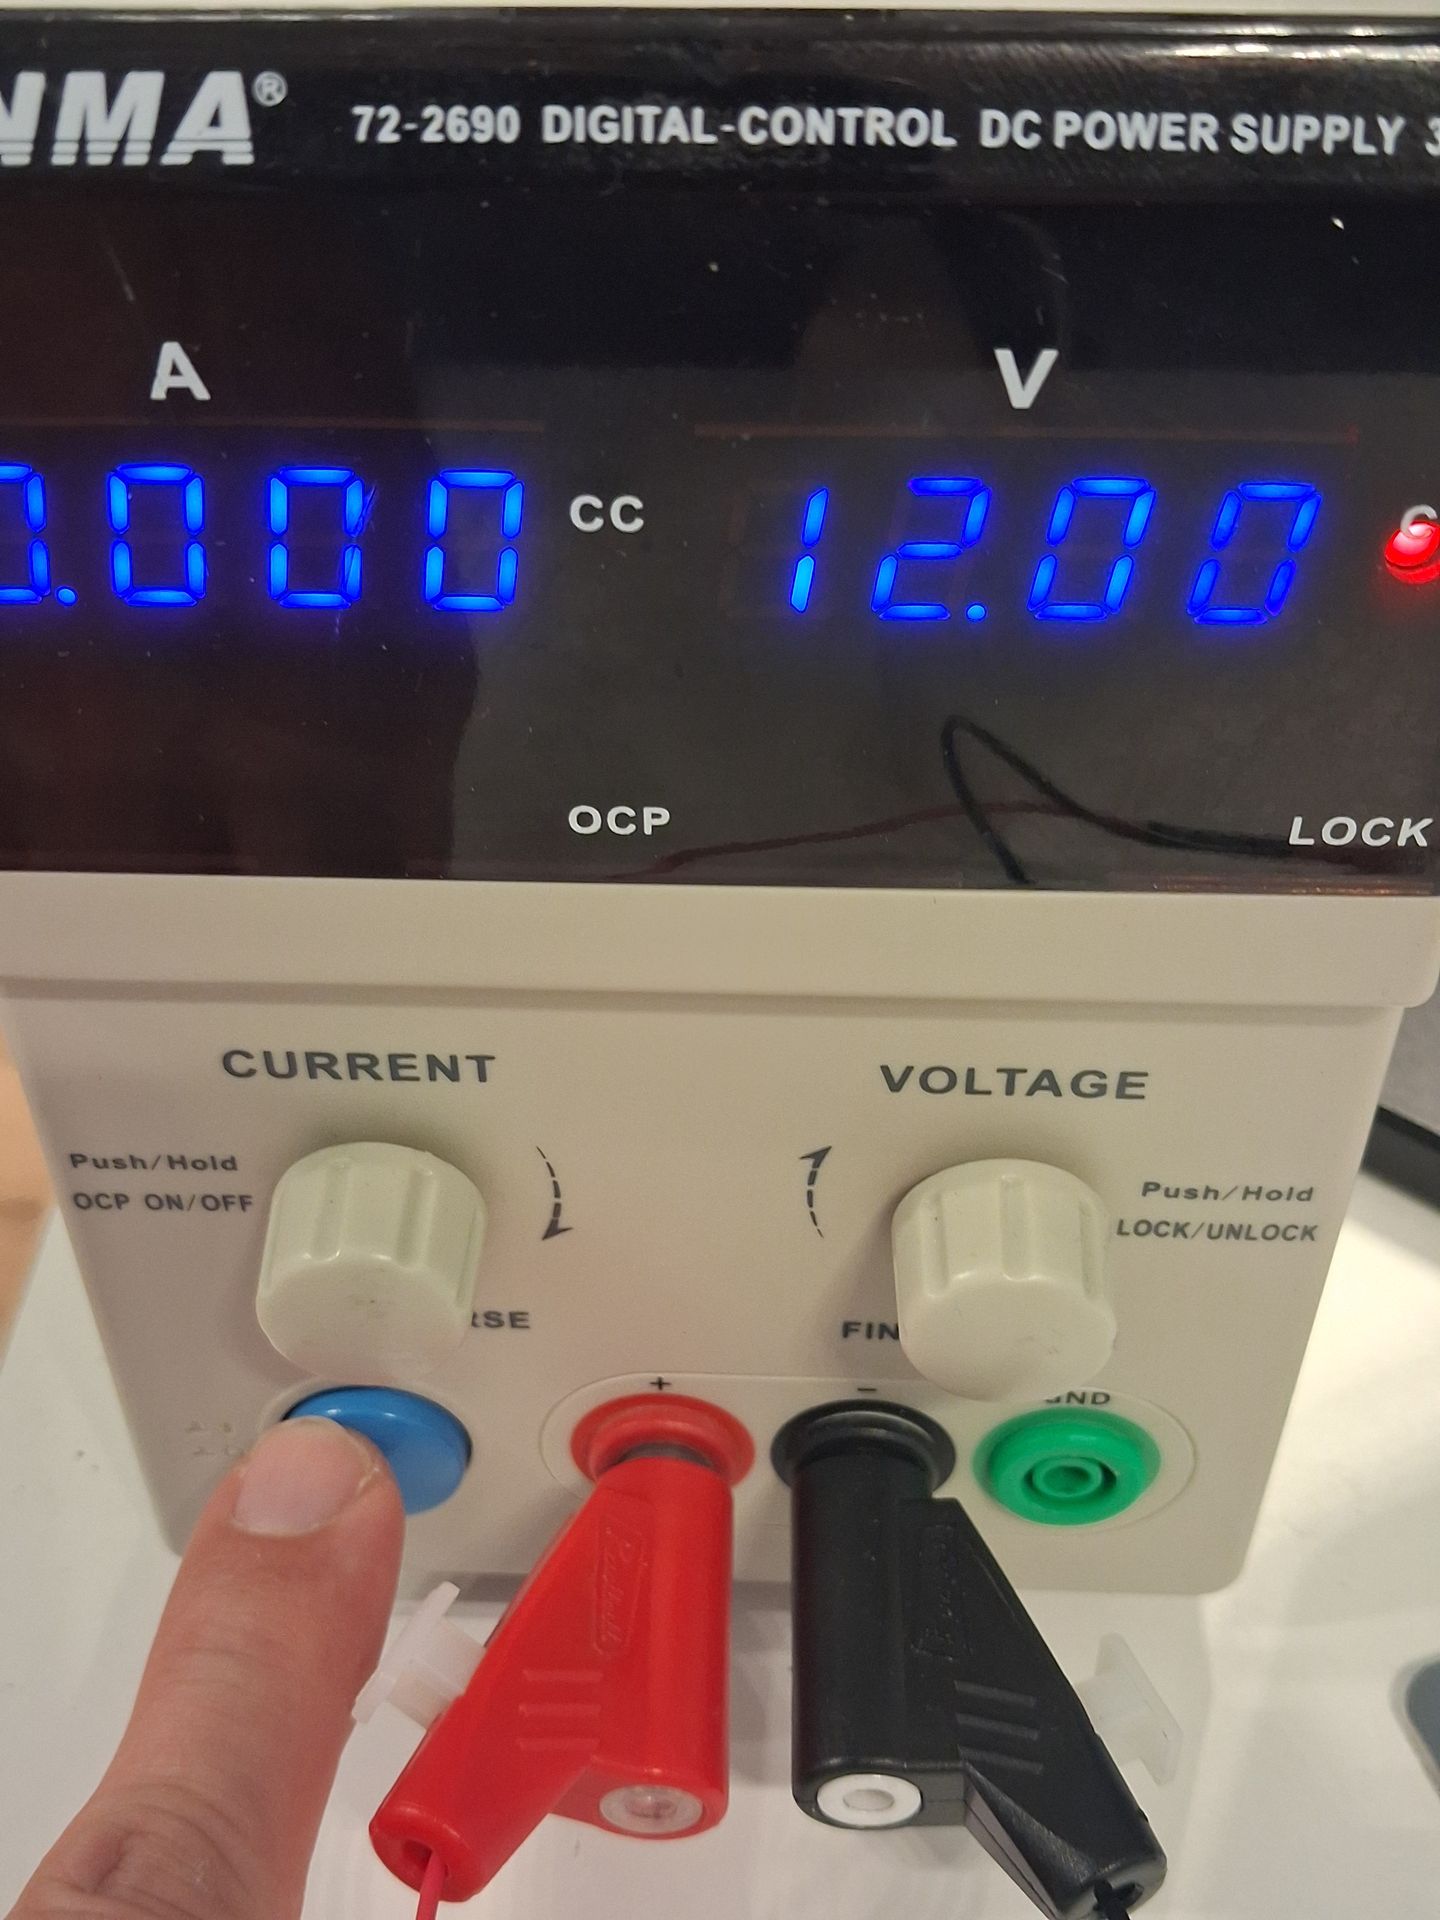
7. Switch the power supply ON (or connect the harness to the vehicle power). The device starts from the external power only, so do not cut the power until the update is done.
8. Follow the update with the LED on the front of the device:
Step | Red LED | Green LED |
Starting | ON | OFF |
Processing | ON | Slow blinking (500 ms ON, 500 ms OFF) |
Critical processing | OFF | Slow blinking (500 ms ON, 500 ms OFF) |
Done | ON | Fast blinking (100 ms ON, 100 ms OFF) |
Failed | ON | OFF |
9. Once the update is done, switch the power off, unplug the pen drive and the adapter.
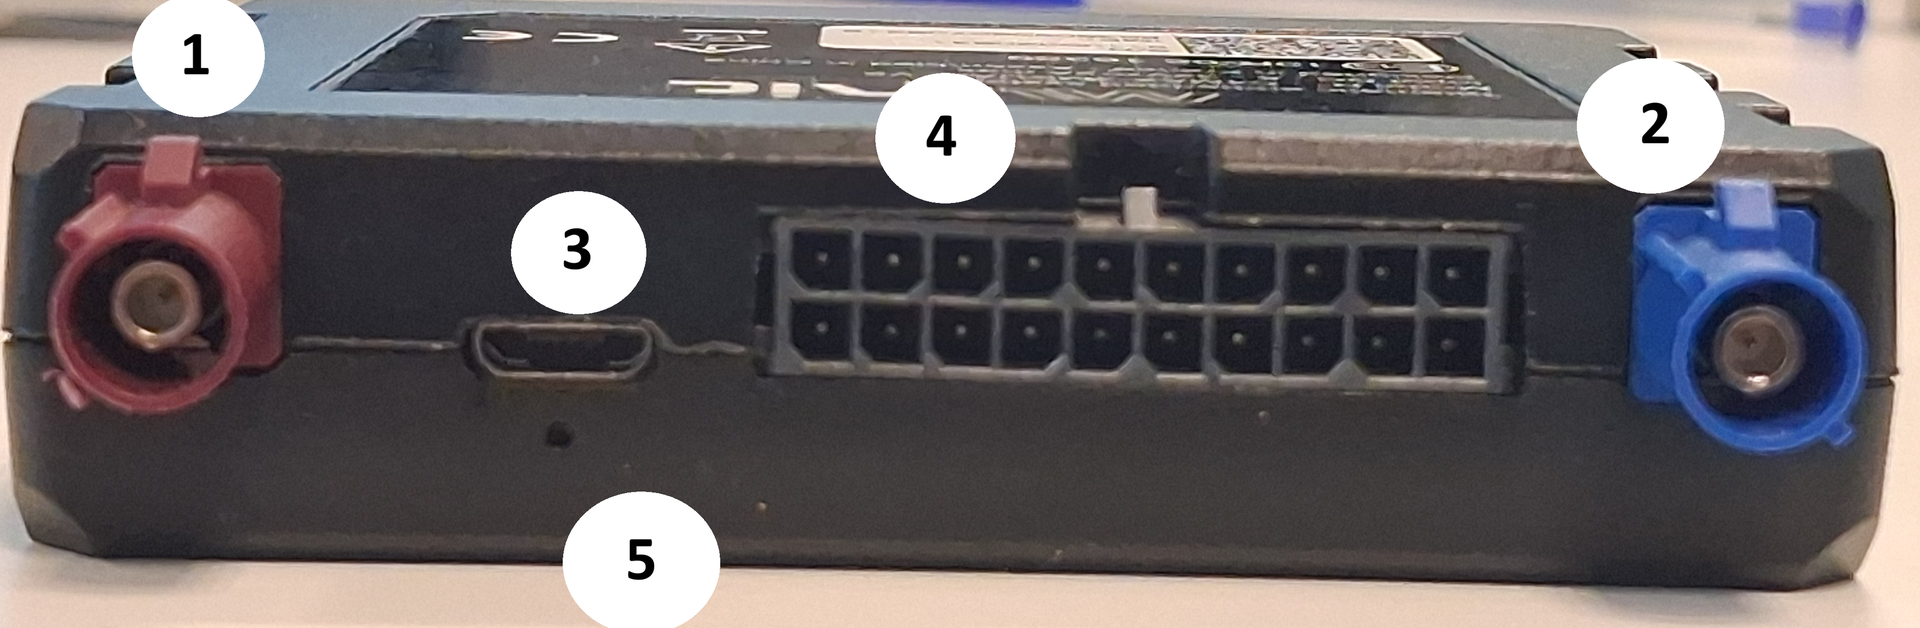
Front view: 1 modem antenna, 2 GNSS antenna, 3 Micro USB, 4 Micro-Fit 20-pins connector, 5 LED.
6. Check the result
Plug the pen drive into your computer. You should see 3 new files at its root:
kern.log (log)
log_update.txt (log)
update_done

If update_done is present, the device has been flashed properly. If it is missing, send kern.log and log_update.txt together with the device IMEI to support@munic.io.
7. Reconnect the battery and close the device
1. Plug the battery connector back onto the circuit board.
2. Put the top cover back in place and press until all four lugs are engaged.
3. Power the device again (power cycle) and check that the LED starts its normal sequences.
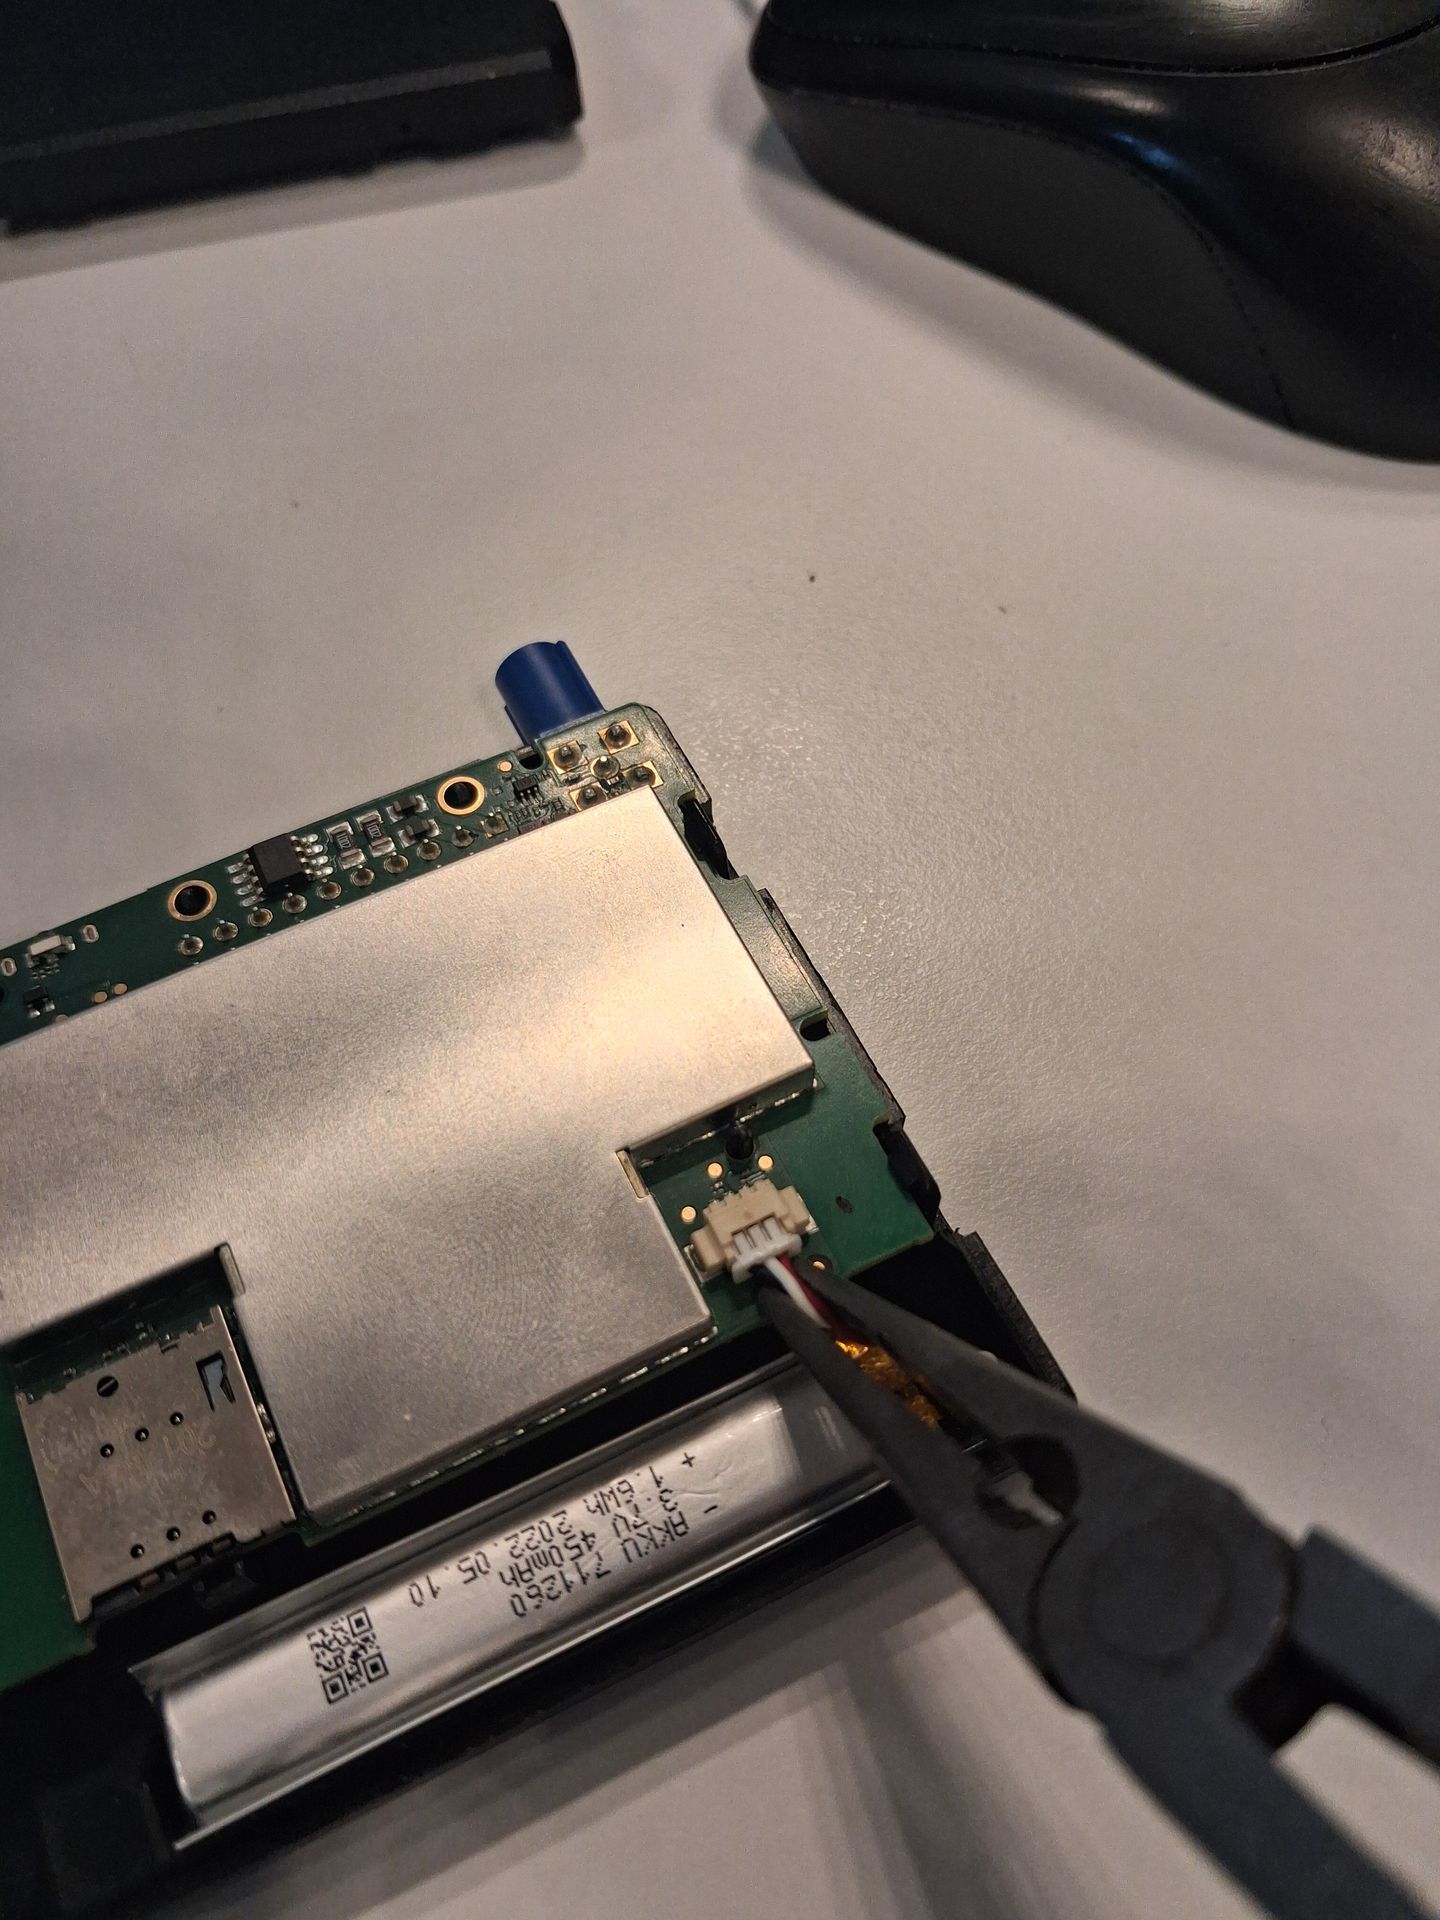
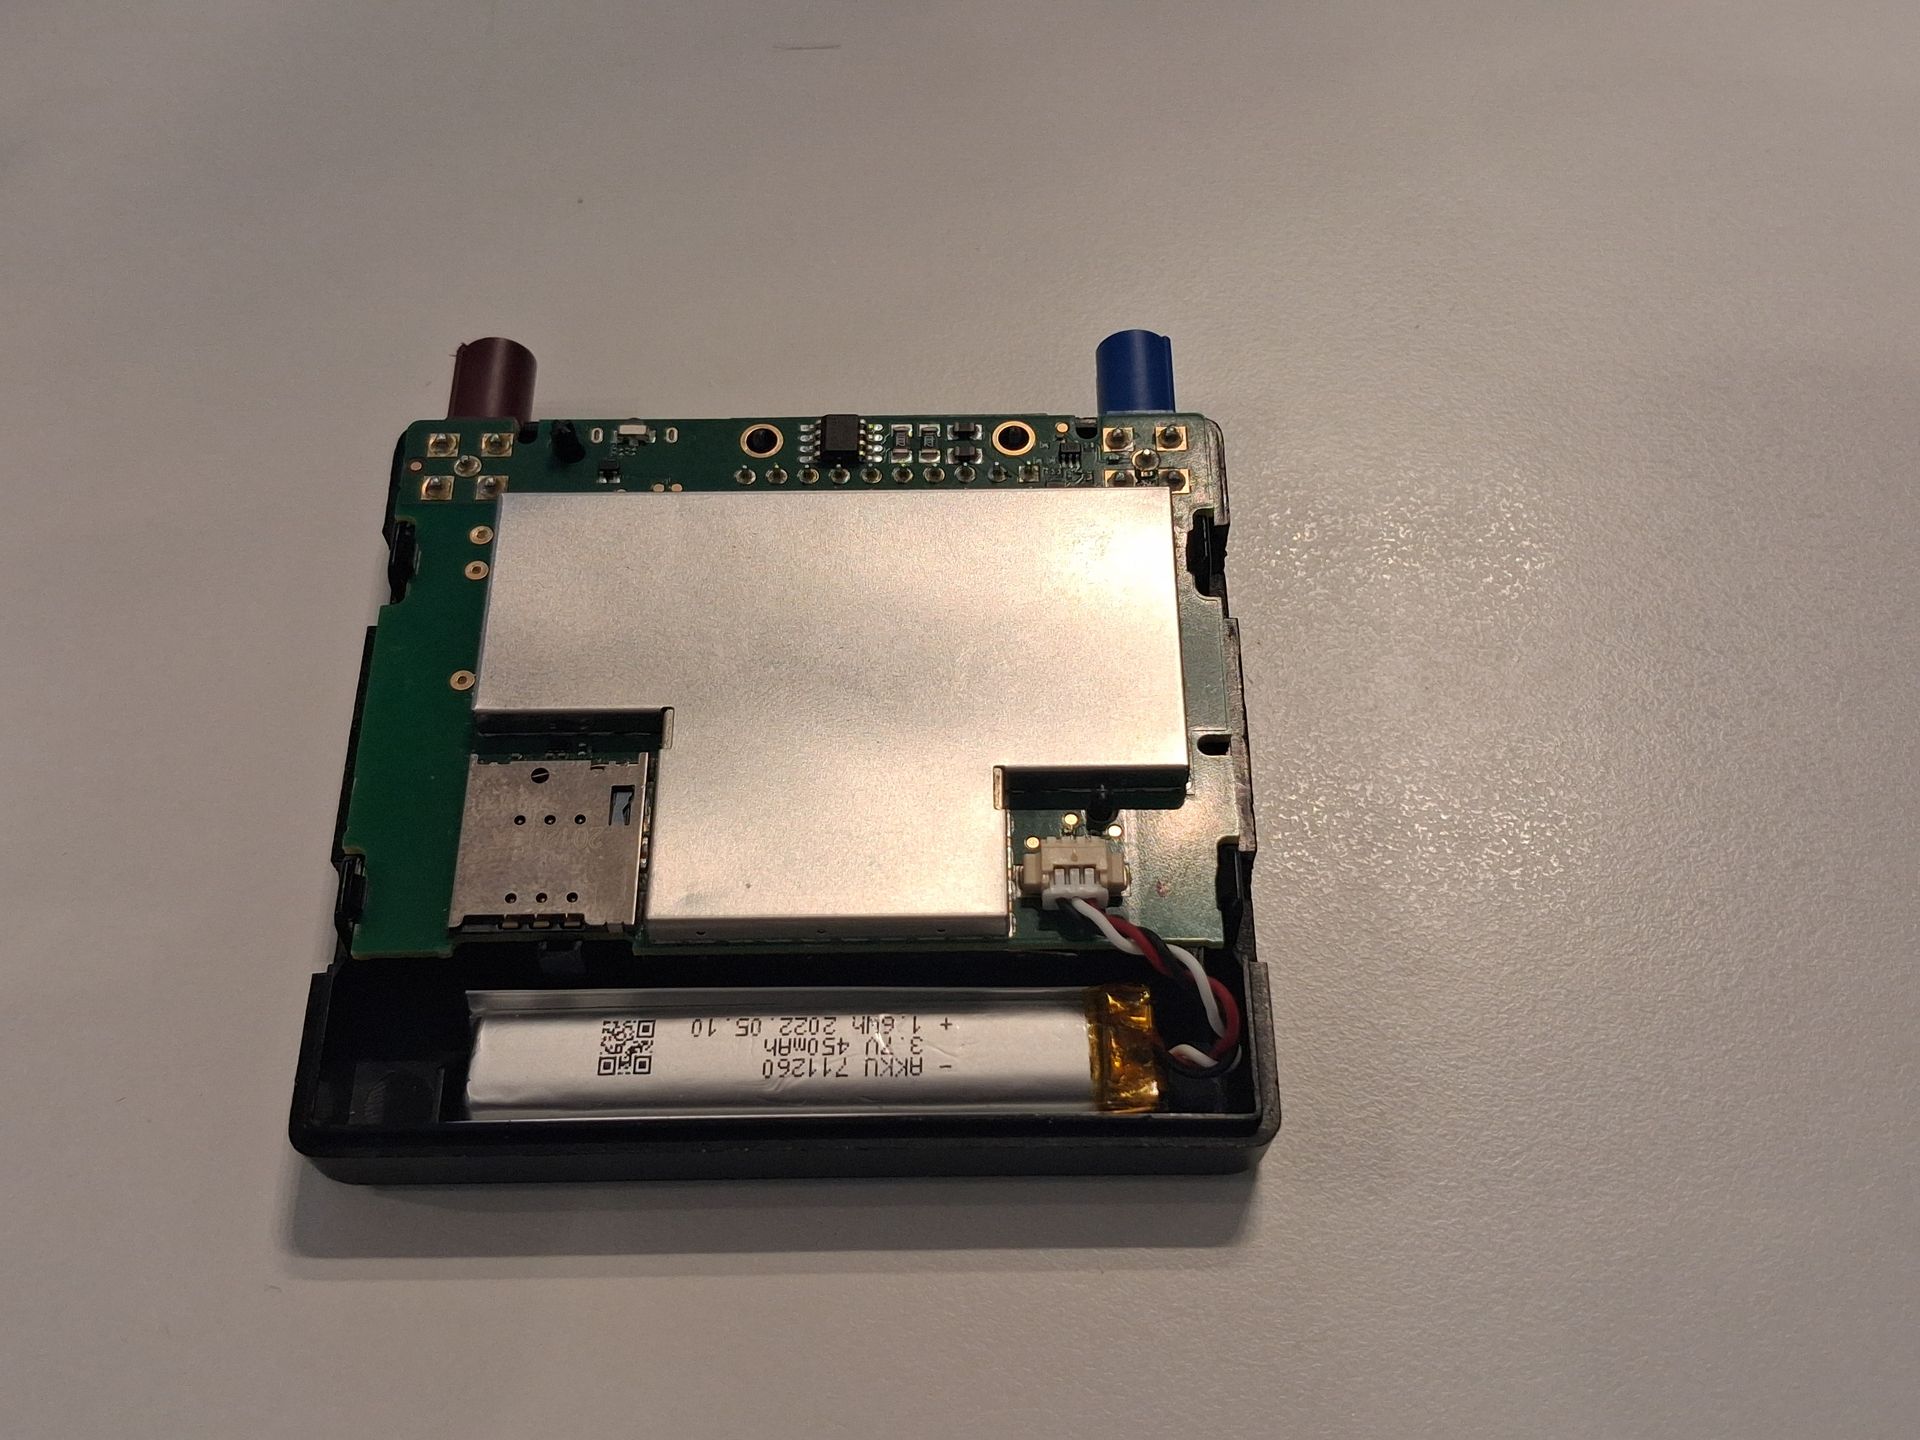
Plugging the battery connector back.
8. Troubleshooting
Symptom | What to do |
LED blinks red briefly every second before flashing | The device is sleeping on its internal battery. Open the device and unplug the battery connector (section 3). |
Nothing happens, no update file on the pen drive | The device must detect the pen drive within one second after power on. Plug the pen drive before switching the power on, use a pen drive of 16 GB maximum formatted in FAT32, and try another pen drive or adapter. |
LED shows Failed (red ON, green OFF), or update_done is missing | Do not use the device. Send kern.log and log_update.txt with the IMEI to support@munic.io. |
Important note
The device must detect the USB key within one second. Please use a USB key with a maximum capacity of 16 GB.
For the full hardware description, wiring and mounting instructions, see the MUNIC C4MAX-EV8 please see our Installation Guide.